Friday, 26 February 2010

Polka Doodles Shaped Card Challenge

Small update on this as I've had a message from Nikky to say that the Create and Craft show producer fell in love with this card yesterday and she's whipped for her desk! All due to Nikky really for such fabulous stuff on the CD!

Morning everyone, hope you've got a bit of sun as we have here today. A great relief as yesterday it chucked down most of the day and my OH and daughter both arrived home very soggy!
This week's challenge over at Polka Doodles has been set by Lou and she would like to see a shaped card for any occasion. Coincidentally, the new Polka Doodles CD Paper Boutique Vol 1 launched on Create and Craft yesterday and completely sold out. Not a surprise as the CD is just fabulous with loads of shaped elements perfect for all occasions.
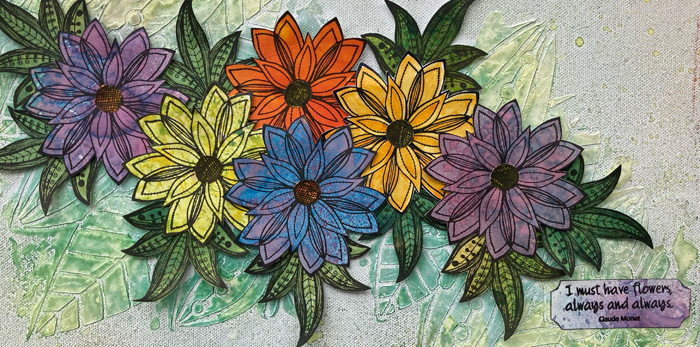
Here's my card and you'll know why I couldn't resist it having 2 little cuties (well, mostly!!!) in our family.
I'm sure you can see why I love this bunny and Leonie was very taken with it on TV yesterday too.
It's easy to make as the clever CD gives you all the elements for front and back to print out along with plenty of decoupage elements so that you can add as much detail as you like.
Some of the other teamies have used designs from the new CD so do check out all their blogs when you have a spare minute. Links are on my sidebar.
Thursday, 25 February 2010

New Polka Doodles CD Launched Today

Afternoon everyone. The new Polka Doodles CD which is called Paper Boutique Volume 1 was launched at 12 noon today on Create and Craft channel. Nikky did her usual fab job of demoing under tremendous pressure with the help of Leonie Pujol and Dave. The CD was selling like hot cakes so it's probably sold out by now but I just want to give you a sneak peek of one of my cards (there'll be another on here tomorrow for the next Polka Doodles challenge).
As you can see, Nikky's images are really clever and in common with the Back to Nature CD, a lot of the elements have a back view as well as a front one. I chose to show this off by mounting my decoupaged bunny in front of an aperture and sticking the back view to it on the inside of the card to give the recipient a really big surprise when they open the card.
The card itself is made from one of the coordinating backing papers with another on the inside of the card to peep through the aperture. I added one of the fabulous sentiments (you can type a greeting in these yourself!) to finish off.

AiFactory Challenge 25-Recipe Cards

Morning folks! A little late with this due to a very busy evening yesterday. This week's challenge over at AiFactory is to create a recipe card with your favourite recipe on it. The Design Team were all given these fabulous recipe cards designed by Mia to play with.
I had to think about this quite a lot because my favourite, most used recipes are mostly in my head so I tend to just go and make them without thinking about the quantities too much. Here's what I came up with.

I made a pocket to contain my cards and sized it to be a liitle larger all round with the back longer so that I could add tabs to pull the cards out. I covered the front with Papermania Candyfloss and Marshmallow paper and used some of this to make tabs for the cards. I made the cards by printing out Mia's templates which come with matching fruity graphics and stuck mine to contrasting card after writing on the recipes. You can type your recipes into the pdf quite easily but I decided to go for the hand written look.
The other DT members have made some amazing things, not to mention shared some great recipes so if you look on the sidebar, you'll find a list of links to click on so you can see their creations.

Friday, 19 February 2010

Polka Doodles For The Birds Challenge and News

Morning all,
I had some great news yesterday as I found out my tartan collage card tribute to Alexander McQueen has gained a Top 3 award over at Sophisticats. Many thanks to Lisa and the girls for making my day!

And now on to this week's challenge at Polka Doodles which has been set by Kris and she would like to see birds on your creation using this great sketch:
For my DT project, I've returned to my favourite Shake a Tail Feather Collection from the Back to Nature CD because I love the gorgeous green, lilac and aqua colour combination.
The card is really quite simple to make as I've layered up several of the pretty papers with some plain lilac card for contrast. My peacock has been cut out and put on a contrasting circle of plain aqua card embossed with the new Cuttlebug Kimmy Luvs folder (you may have noticed this keeps popping up but I just love it!).
To make all the card elements really pop, each of the pieces has been inked around the edges with a black ink pad. I added a circular matching greeting and some cut out flowers and feathers to finish.

Now for some more news which is a little hush, hush at the moment. The next Polka Doodles CD which is called Paper Boutique is being launched next Thursday, 25 February and we're all working on samples for Nikky at the moment. Believe me when I say, you're going to LOVE this! The elements on the CD are just gorgeous and I can't wait to show you what I've made!
Fliss x

Thursday, 18 February 2010

AiFactory Challenge 24 - 3D

Morning everyone, over at AiFactory Challenge this week the challenge is to make a three dimensional project and the DT were all challenged to make something with Mia' s downloadable vintage calendar - anything except a calendar!

This made everyone think outside the box and really brought out the creativity. Here's the wall hanging that I made with it using just some of the birds from the decorated top section.


I've inked my tags with Peeled Paint and Broken China Distress inks and then applied Vintage Photo using a kitchen scourer-yes, really! It gives a speckled effect rather like birds eggs which fit my theme perfectly.
I then applied torn papers and collage elements together with the cut out birds. I painted some Basic Grey chipboard letters with copper metallic acrylic paint and added these to finish the tags. I tied on some twisted paper string and attached the tags to a stick with this.

If you click on the names on the side bar under AiFactory DT you can see what the others have made and there's some fabulous creations there. It's incredible how many different things can be made from one item.

Check out the challenge too on the Challenge blog (link above and on sidebar).


Saturday, 13 February 2010

Just Rosy

Hello everyone!
Finally got this one finished after an accident earlier with the stickiest ds tape ever which stuck itself to the card blank when I wasn't ready and ruined my original background which had more stamping on it. Obviously wasn't meant to be lol.
This is my entry for Hels Sheridan's Sunday Stampers challenge with a theme of Roses. My entry was inspired by a dress I saw last week at the Stitches show which was a costume worn by Keira Knightly as The Duchess. It was absolutely gorgeous and had silk roses round the neckline.
 
Ingredients Used:
Papermania Build A Rose Clear Stamp Set
Papermania Nostalgia Warm Patterned Paper
VersaFine Vintage Sepia Ink
Elegant Ladies Collage Sheet by Dezinaworld
Pink Crochet Lace
Copper Brad

Friday, 12 February 2010

Tartan and Alexander McQueen

My daughter arrived home from college yesterday after their fashion show of the garments they've all just made with the sad news of the death of designer Alexander McQueen who has been such an inspirational influence on the fashion world in the last few years.
Having taken my daughter and a friend to The Clothes Show Live at the NEC 3 years ago whilst they were both studying textiles, I saw a fashion show there which included some of his clothing and his tartan designs. As you can imagine, with a daughter studying fashion design, I see quite a lot more of the fashion designs than most people and I have seen just how much influence McQueen had on other designers as well as the high street.
As the challenge set by Avril on Sophisticats this week is to use tartan on your project, I have created a tartan collage as a very small tribute to a designer who will be much missed.
Ingredients Used:
Image by Dezinaworld from the Sew 1 Collage Sheet
Dress Stand Digital Stamp by Stretch 'n' Bubbles
Tartan Papers except the blue one from Art Freebies Blog
Blue Tartan from a Scottish Clan Tartan Website
Text Printed On Computer
Thanks for looking, Fliss x

Polka Doodles Hearts and Flowers Challenge

Morning All.
It's time for the next challenge over at Polka Doodles and this week's has been set by Dolly who wants to see hearts and flowers on your creations.
Mine is all in the pink and only has one flower but it does have lots of hearts!
This card is really simple to make and uses the lovely Heart collection from the Polka Doodles Love & Cherish  CD. I've printed out a couple of the lovely borders and combined them with cut out hearts (I enlargerd the size of the bigger of the two a little) embossed using the new Cuttlebug Kimmy Luvs hearts folder which I've just got my hands on. I've used some of the pretty polka dot backing paper trimmed with the Martha Stewart daisy scallop punch and added a paper flower and an inked computer generated sentiment to finish.
Fliss x

Thursday, 11 February 2010

AiFactory Challenge 23-Hearts

This week's challenge over at AiFactory Challenge blog is all about hearts, as many as you can get on your card by way of backing papers, embellishments and so on. The design team have all been given one of the Softpencil images to work with-it's really sweet and is called A Lovely Couple. You can see more of the gorgeous images by popping over to the shop.
Here's what I made with the cute image.
I printed the cute couple twice and coloured just the hats on one couple and the remainder on the other using various colours of Promarkers. I stuck the hats on with foam pads for a raised look. I mounted the panel on red paper, trimmed on one side with a Martha Stewart dot scallop edge punch.
I made up the card using Basic Grey Ambrosia papers arranged in a patchwork square pattern. I layered a piece of the plain paper from the pack across the centre, embossed using the Cuttlebug Kimmy Luvs hearts folder. I finished off with a punched, embossed heart with a glitter flower embellishment and a computer generated sentiment.
To see the gorgeous cards made by the rest of the Design Team with the same image, and get an idea just how diiferent it can look, see the side labels for a list of their blog links.
Thanks for looking.
Fliss xx

Wednesday, 10 February 2010

AiFactory Prize Blog Hop

This post will remain at the top until the hop is over so please scroll down for later posts.

Hello everyone and welcome to the AiFactory Blog Hop. Today's the day to meet all the Design Team Members and there is a prize on offer to some lucky person who joins in.
We will be randomly picking one comment from one of the DT members' blogs to win a fab prize of a $20 Gift Certificate to the AiFactory store. Make sure you leave a comment on all the blogs though as the chosen blog is a secret.
If you arrived here from Monica's blog then you're on the right track but if not then go to the AiFactory Challenge Blog and start at the beginning.
Each DT member has been given one of three gorgeous images to work with so that you can see the different ways of making a beautiful project.
I've been given the cute Love You Ella and here's what I made with her.
I printed Ella out and coloured her with Promarkers. I cut her out and put her on a heart shape that I cut from white card, embossed with the Cuttlebug Floral Fantasy folder and then inked a little with pink inks.
The pretty paper I've used is by My Mind's Eye and called Pretty Please (it actually came free with Cardmaking & Papercraft magazine and included 6 x 6 papers plus borders and tags). I trimmed the top and bottom of the border with small scallop scissors and the papers with large scallop scissors. I added fabric flowers and buttons to finish.

The next blog that you need to visit is Fink's and don't forget to leave a comment here for the chance to win the fab prize which will be drawn on Wednesday 10 February at about 11.30pm.
Good luck!

Moonlight and Romance

Here's my offering for today which is a card that fits quite a few challenges as there are rather a lot about with a love theme-not really a surprise with Valentine's Day at the weekend.
I've again gone for a shabby chic look as I really like making that sort of background paper at the moment. It's very satisfying screwing something up and knowing it will look fabulous when you've finished! I sprayed my piece of white card with water and scrunched it up. I opened it out, sprayed with more water and scrunched again then opened it out and rubbed red and pink inks on the creases. I then ironed it and stamped Clearly Inspired Stenciled Flowers MC3216 roses all over in VersaColor Rose Red ink. I tore the edges.
The image I used, together with the heart shaped music manuscript come courtesy of the lovely June at Art Freebies blog where she generously shares loads of gorgeous images to use in personal artwork.  The card also gave me the opportunity to use one of the beautiful heart shaped doilies I finally managed to find a couple of weeks ago after seeing these on several of my American blogging pals blogs and wanting them!
I finished off with an inked computer generated sentiment and some pearl trim.
Here's the Challenge List:
Cupcake Craft Challenges      Red and White
Delightful Sketches Challenge     Love
Digital Ink Co                         Valentines and Love
Fab 'n' Funky Challenges        Shabby Chic
Paper Play Challenges             Love
Simon Says                              Love
Stamp Something                     Love Somethings
Stampin' For The Weekend      Love Is In The Air
Tuesday Taggers                       Love Is All Around   ( to be eligible for the prize on this one you also need to show a link to the sponsor Craft Emporium and I had a look at the online shop which has some awesome things on there-click here to see for yourself.
Well, that's me done with the longest list yet!

Tuesday, 9 February 2010

Time Is The Key

Hello all. Time for another challenge card which I didn't think I was going to finish in time as there aren't enough hours in the day at the moment to get everything done!
This one is for Ready, Steady, Stamp Week 14 challenge with 5 ingredients as usual:
I really enjoy these challenges as they really make you think outside the box and I actually managed to combine one thing this time as the die cut border is made from funky foam. Might be cheating a little but I thought any more on the card would be too much lol.
The stamps used here are both by Crafty Individuals. The little girl is CI-110 anf the flourishes on the background paper CI-173.
To make the background, I wanted a shabby chic effect so I stamped the flourish background repeatedly on cream card with green and copper inks. I then rubbed sand beige ink over the top. I tore the edges and rubbed them with copper ink.
I stamped the little girl collage in black on white card and sponged on Split Pea and Sand Beige VersaColor inks. I trimmed the edges with deckle scissors. I cut a piece of copper metal sheet, trimmed the edges with the deckle scissors and embossed it using the Cuttlebug Textile folder. I glued the collage image to the metal.
The die cut funky foam border started off purple and I altered it by sponging with antique gold, then sand acrylic paints. I added dots to the centre of the flowers with a black dauber.
The heat embossed metal was the most tricky bit as I wanted to emboss my metal flower with copper powder and stamp into it but it all peeled off! I had to settle for just embossing it with the copper powder and then layered it up with 2 beige fabric flowers and a copper brad. I added green Prima art leaves to finish.

Monday, 8 February 2010

Cottage Charm

Morning All. Finally managed to finish the card for the challenge combined with a blog hop which has been organised by my friend Brenda on behalf of Sir Stampalot to celebrate their recent move to new premises. The challenge theme is of course MOVING and if you haven't yet had a go at the fab blog hop do pop over to Brenda's blog Floral Fantasies to get all the details and see all the fantastic prizes on offer. If you do a card for the related challenge there's a really big prize up for grabs.
Here's what I made for the challenge which has a country theme inspired by some gorgeous new stamps I recently acquired.
The absolutely gorgeous cottages are from Crafty Individuals CI-263 and are one of their brand new releases. I stamped them and coloured them with several shades of my favourite Distress inks for a soft look.
The paper came free with Crafts Beautiful magazine and is perfect with the cottages as some of it looked like a cottage garden. I copied mine on to linen paper and altered it with Distress inks a little to keep the soft look and added 2 of the pretty borders at the base of the card. I cut out 2 of the butterflies and rounded them with an embossing ball tool before sticking on with foam mount.
I made the inside of the card match by using the remaining piece of cottage garden paper and a sentiment mounted on pansy border paper.

Saturday, 6 February 2010

Artful Life

Hello everyone. Hope you've got a lovely sunny day like we have in the South today.
I've a card here which fits 3 challenges and which gave me very blue hands until this morning after an accident with a really leaky Cosmic Shimmer spray bottle. Was I glad I didn't have to go anywhere yesterday evening!!!
The first challenge is The Play Date Cafe with a colour theme this week of dark brown, tan, blue and green.
The second is the ABC Challenge with a theme of N is for New which on this card is the gorgeous butterfly and leaf stamps.
Lastly, the third challenge is Lots To Do with a theme of Backgrounds (make your own that is which you all know is right up my street!)
The collaged background here was created by stamping Judikins 2957 H and Hero Arts Art, Like and Beauty G2678 twice-once in VersaFine Vintage Sepia and once in VersaFine Majestic Blue. The brown images were then inked with Spiced Marmalade and Vintage Photo Distress Inks. The blue ones were inked with Pine Needles and Broken China Distress inks. They were then sprayed with Olive Vine Glimmer Mist. These were then adhered to a card blank. A corrugated panel painted with deep blue acrylic paint was adhered across the centre.
The butterfly was stamped in brown on a background sprayed with green and blue Sticky Fingers inks, followed by Cosmic Shimmer Aqua mist.  It was embossed with clear powder and brushed with Distress Stickles in Tarnished Brass.
The leaves were stamped in brown, inked with Distress Inks and sprayed with Olive Vine Glimmer Mist for a bit of sparkle.

Friday, 5 February 2010

Polka Doodles Paper Piecing Challenge

Please join us for this week's challenge at Polka Doodles which has a great theme of Paper Piecing and has been set by Claire.
My card is a mix of several CDs and I decided to go for a bright Spring colour theme (I live in hope!!!).
Most of the card elements, including the pretty green paper, the cute image, the cut out flowers and grass and the text, came from the Back to Nature CD and the pink polka dot paper from the latest Love & Cherish CD. You'll find these at the Polka Doodles online shop.
The flowery paper I made myself using my Millefiori stamping technique with pink, yellow and green inks and 2 of the tiny flowers from the gorgeous Polka Doodles Daisy Doodles stamp set. I also had to be a little creative with the scalloped green oval as I don't yet have my wished for Nestabilities set. I cut mine with small scallop scissors.
I printed the image on the green paper and the polka dot paper and cut various pieces out. The rest of the image I coloured with my Promarkers.

Wednesday, 3 February 2010

Just A Rose

This is my entry for the latest challenge at Simon Says which has a photo inspired theme of roses.
This gave me a chance to use my favourite rose paper from the latest Polka Doodles Love & Cherish CD. I chose the rather glamorous pink and black colour way and used this for the backing paper and then cut out a further rose to use as an embellishment. I mounted this on a white circle embossed with the Cuttlebug Roses folder matted on black. I finished off with a central white panel, stamped in black with the gorgeous flourish from the Polka Doodles Daisy Doodles stamp set (26 stamps in this set!!!) and some black lace.