Showing posts with label Books/Altered Art. Show all posts

Friday, 6 December 2019

Long Time, No See!

Hello everyone!
Just realised it's an absolute age since I last blogged everything and don't know where the time has disappeared to. I've been so busy with various things again and trying to keep up as I used to has been really difficult.
I finally have the house to myself again for the first time in nearly 2 years as my elder child moved out again last Sunday having finally gained a permanent job rather than a contract based one since being made redundant at the beginning of last year. I have to say it feels a bit weird getting used to it again!
The moving out actually coincided with the Indigo Blu Dirty Weekend in Brighton last weekend which I was lucky enough to attend, spending the first day with Leonie Pujol and the second with Kay Halliwell-Sutton. I was really lucky to meet 2 celebrities too, Julia Watts who demos on Hochanda for various companies and Alex Turchyn who's one of their presenters. Both of them were creating along side us. Had a fabulous time and got very messy!
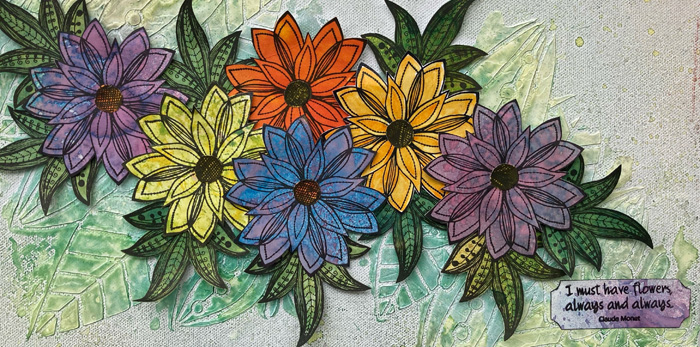
I created the triptych with Leonie and the altered cabinet with Kay. Hope you like them.


I'm over at That's Crafty! Blog today with a couple of frosty Christmas cards that I actually created for the July Hochanda shows (rather than me as I'm still working on mine!) You can find all the details on the blog.


Here are a few more of my creations that you may have missed as they didn't appear on here!


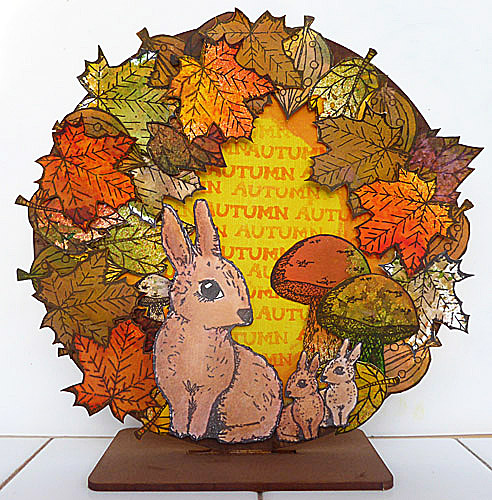


As you can see, there are a lot of bunnies which is because I was lucky enough to get this gorgeous stamp set to create samples with and I just love it! I couldn't stop creating with it!

Hope you're all well and I think my New Year resolution has to be to blog more often as my poor blog has been very neglected this year.

Best wishes.
Fliss x

Friday, 6 April 2018

Floral Bag for That's Crafty!

Hello everyone on what seems to be finally a lovely Spring day. We have sunshine and the happy birds are singing as I type this. Hoping it lasts as it's much needed after the bank holiday washout!

I'm over at That's Crafty! Blog today sharing a rather different project this week as I've been painting and stamping on fabric and I think I might become a little addicted so watch this space!


Have a great day and a lovely weekend and see you soon.
Fliss xx

Friday, 19 May 2017

Marina's Treasure Trove for That's Crafty!

Hello everyone, sorry to have been a bit of a bad visitor this week. This is because I'm back at work and now have to rest my eyes a bit after my cataract op last week as I spend all day on the computer at work looking at figures on spreadsheets. It takes the eye around a month to properly recover so you'll have to forgive me if I don't visit as often for a while.

I'm over at That's Crafty! Blog today with the first of a series of makes with Donna's new and fabulous Deep Sea Divas stamps which I was totally thrilled to be able to work with before their official launch this week. If you didn't see it before, I also created a couple of makes for the Stamping Contrasts feature in the June issue of Craft Stamper which was such a thrill too.

I have to say that these stamps are incredibly versatile and I can't seem to stop making things with them so there will be a lot more show and tell moments over the coming weeks.


This is just a sneaky peek of part of my mixed media creation so you'll need to hop over to the blog if you're intrigued to see the whole thing, which I hope you are of course!

Have a great day and a lovely weekend.
Fliss xx

Friday, 8 April 2016

Colour My World At That's Crafty!

Hello everyone, I hope you've all had a good week. I'm still in Swanage at the moment on my few days break which has been lovely despite the rather mixed weather but we've still managed to get out and about most days and there has been sunshine although it is still very windy and rather cold.
This post is to let you know I have a prject to share over at That's Crafty! today which is an art panel using one of the surfaces, in this case an MDF panel, with my newly acquired Paper Artsy stamps by Darcy.
It's one of my favourite colour combinations too so I hope you like it.


You'll find all the details over at the blog as usual if you'd like to hop on over to see how I created it.

Have a great day and a lovely weekend.
Fliss xx

Friday, 5 February 2016

Butterfly, Butterfly Brusho Stackable Storage Box

Hello everyone and welcome to the first of 2 posts today and I can't tell you how excited I am to finally be able to share a project that has been under wraps for a while.
Laura and Graham at That's Crafty have developed a range of stackable storage boxes designed to hold some of your favourite art supplies such as paint, spray inks, glitter glue and so on.
As I'm such a fan of Brusho Crystals, you can probably guess who was given that particular storage box to decorate!
If you hop on over to the blog you'll find all the details of how I made the box with step by step decorating pics.
It's rather eye poppingly bright as I wanted something eye catching.


This one has winged it's way (pun intended!) to Laura as That's Crafty will be doing something special later in the month but I do have another one to decorate for myself and I'll share that as soon as I'm able to find some spare time to get it done - I can't wait!

Do hop on over to the blog where you'll find the details of the other fab storage boxes, all beautifully decorated by my DT mates!

I'll be back in a while as we have a new challenge starting today over at That's Crafty Challenge Blog and I have some rather quirky inspiration to share.

Fliss xx

Friday, 16 October 2015

Someone To Watch Over You For That's Crafty

Hello everyone, I'm really sorry not to have been round to see you this week or so which is because I still have the nasty bug I went down with at the beginning of last week. I'm at the horrible coughing stage and it's made me rather tired so I haven't felt much like crafting.

I have a project to share today over at That's Crafty Blog which I hope you like.  It's just as well I created this last week as I haven't made anything since!


Have a great day and a lovely weekend and I'm hoping to be back very soon.

Fliss x

Friday, 8 May 2015

Steampunk Surprise!

Hello again and welcome to my inspiration for our new challenge at That's Crafty Challenge Blog and I have to say I was thrilled to bits with the theme as my creation was inspired by my secret (or now not so secret!) obsession with Victorian Steampunk novels which has been fuelled by the Kindle my dear hubby gave me as a present last year.
As soon as I saw the Carabelle Studio Femme Neoromantique, the image was a must for my little art panel as with her goggles she looks just like one of the heroines of my favourite novels.


I decided on a mixed media panel which started off as a square Paper Artsy Greyboard Panel. I cut a square of smooth card to the same size, partially dry embossed it with a cogs and gears folder then inked it up with Rusty Hinge Distress ink and swiped over the top with Chipped Sapphire and Walnut Stain Distress inks. I then glued it to the greyboard panel.
I cut an arch shaped panel of strong card slightly larger the main image and another arch panel a little larger to make a mat.
I dry embossed the smaller panel with the cogs folder and then swiped on embossing ink and heat embossed it with Frantage Aged Bronze Embossing Enamel. I rubbed Chipped Sapphire DI in the areas with slight gaps.
I heat embossed just a wide band round the edges of the larger arch with a mix of Cosmic Shimmer Tarnished Gold, Black and Verdigris embossing powders.
I stamped the woman image on smooth card with Archival Jet Black ink and painted her with watercolour pencils before cutting her out. I then rubbed on a little Pumice Stone Distress ink to makes the edges pop.


I glued the arches together and then glued on the image, adding foam tape under her head for dimension.
I next stamped the Carabelle Studio Steampunk:Machine a remonter le temps image twice on smooth card and heat embossed it with the Frantage Aged Bronze. I then coloured them lightly with Seedless Preserves Distress ink and cut them out.
I added these to the panel and glued the arched panels over the top.
I embellished the panel with some chipboard cogs which I heat embossed with the Frantage Aged Bronze and Verdigris embossing powders. a metal key which I added a little Verdigris heat embossing to and Dymo tape text.

Hope you like my creation and that you can join in. You have a fortnight to enter and there's a £20 voucher to the online shop for the randomly drawn winner although please check the rules about this.

Have a great day and a lovely weekend.
Fliss xx

I'd like to link this up to the following:
Altered Eclectics - Anything Goes (mine started out as a plain greyboard panel)
Cuttlebug Mania - Stamping (I used my beloved Cuttlebug and the gears folder) My image is stamped as ere the clock and gear side panels)

Friday, 4 July 2014

Going Steampunk For That's Crafty

Good morning all, hoping you've all had a lovely sunny week which has been so warm here and it's fabulous to be able to walk about in short sleeves at last.
As it's a certain date I'd also like to wish a very Happy Fourth of July to all of you in the United States - have a great day!
It's my That's Crafty day today and this week I'm sharing an altered arch frame by those lovely peops over at Tando Creative who make such wonderful and amazing value items crying out for ink or paint so this time I got very messy indeed and had purple fingers for a while!
I hope you like my tranformation and you'll find all the details of how I created it over at the blog.


If you haven't yet entered our latest challenge over at the That's Crafty Challenge Blog, you still have a week to enter your creations with a seaside flavour as the theme is All At Sea - why not give it a try as the winner is randomly chosen to be fair to all entrants.

Have a lovely weekend,
Fliss xx

Some challenges I'd like to enter:
Crafty Creations Challenges - Things With Wings
Altered Eclectics - Anything Goes - mine is an altered chipboard arch frame
Rhedd's Creative Spirit - Anything Goes Altered Art

Friday, 1 March 2013

Spring Flowers

Good morning folks, this is my first post for the day (another will be popping up soon!) and you'll notice that I'm fully into Spring mode at the moment as I have another flowery spring creation to share with you here.
The reason for this one is the new Polka Doodles challenge today which has the theme of Spring Flowers so you could either use just flowers or add some to your creation as I have done. Mine is a little wall hanging decoration which I made for Nikky as a sample for the latest Cherryblossom Lane CD and if you caught the recent shows, you might have spotted this on the counter.


To make the wreath, I cut a scalloped circle of grey board and covered this with peach polka dot paper. I then printed out a variety of flowers and leaves from the CD together with the cute hugging bunnies and a butterfly.
I cut them all out (whilst listening to my ipod!) and assembled the flowers and leaves on a second scalloped circle with the centre circle cut out and the resulting frame covered with green patterned paper. I added the butterfly and then sandwiched some yellow wired ribbon between the layers to make a hanging loop.
I added the sweet bunny friends and the text which I printed out, die cut and added brads to.

Hope to see you there and will be back a bit later on!
Have a great day.
Hugs,
Fliss xx

Some challenges I'd like to play in:
Craft Us Crazy - Anything Goes
Crafty Ribbons Challenge - Anything Goes With Ribbon
Divas By Design - Anything Goes

Sunday, 10 February 2013

Tales Of The Riverbank

Hello folks, hoping you're all having a lovely weekend and managing to fit in some crafting like me.

Today sees the start of a new challenge over at Fashionable Stamping Challenges and I had a bit of a dilemma with this one as I couldn't decide which of my many stamps on this theme to use! The challenge is Birds which is why I had the struggle but I finally decided on a riverside theme as I wanted to ink up my gorgeous Artemio kingfisher stamp. I made a little piece of artwork that will probably end up on the wall although I haven't yet added the hanging element. Hope you like it.


I made my background paper first with a square of thick watercolour paper which I sprayed with water and then swiped on Distress Stains in Crushed Olive, Shabby Shutters, Squeezed Lemonade, Mustard Seed and Dried Marigold. I dried this off and then stamped on the large fern leaf sprig from the Hero Arts Fern stamp and die set with VersaFine Spanish Moss. I stamped some on scrap paper first for a faded effect.
I cut a slightly larger square of recycled greyboard and inked round the edges with Distress Embossing Ink then heat embossed with Fran-tage Aged Green Embossing Enamel. I distressed the edges of my background paper with an emery board and added this to the greyboard panel.
I stamped the kingfisher on thick smooth cartridge paper with Memories black ink and then coloured him with Tombow markers and pastel pencils. I cut him out to leave a narrow off white border.
I made the distressed panel by applying Tumbled Glass Distress ink to a rectangle of the cartridge paper direct from the pad and then stamped on the Kaisercraft Wood Panel stamp with Weathered Wood DI and embossed with the Cuttlebug distressed stripes folder and swiped the ink on the raised areas.
The embellishments were made by  stamping the fern with the moss ink and the dragonflies with VersaFine Deep Lagoon. I then coloured the 2 dragonflies with Tombow markers then cut them out with the die and sponged with VersaMark ink and heat embossed with sparkly powder. The fern was die cut and because of the large white areas left, I sponged on some Crushed Olive DI to make them blend in.
I assembled the panel as you see with a mix of double sided and foam tape.

The Design Team have a gorgeous array of very different creations on the catwalk so don't forget to pop over for a look. We also have our usual lovely sponsor, Marina of Cottage Crafts with a voucher to spend in the online shop for our randomly drawn winner.

Have a lovely Sunday.
Hugs,
Fliss xx

Some challenges for my recycled art panel:
Craft Us Crazy - Get To Cutting (die cutting in my case)
Sarah Hurley Challenges - Anything But A Card
Divas By Design - Winged Things
Stamping Sensations - Fur and Feather (think you can see I have feather tee hee!)

Wednesday, 14 November 2012

All Spruced Up!

Hello everyone and welcome to my new followers - so lovely to see you here and so glad to have you.
I'm  here today with another Christmas decoration using some recycled materials along with some of the gorgeous images you'll find on the Studio 12 Picknix Collection 2 CD - Gingerbread Twist which is my inspiration for Studio 12 Creative Team.
I adore robins as we have a pair that nest every year in the ivy twining round one of our pergola posts and they're so cute when feeding their babies so the gorgeous images on the CD are a real favourite of mine and I couldn't resist using one of them on my decoration.
Here's what I made:


It's actually simpler than you might think as the base is made of 2 circles of greyboard, one left whole and the other with a central hole cut out. I used a circle cutter as I didn't have the right size dies but if you do it's a lot quicker! I painted the ring circle with deep green acrylic paint.
I then made the inside section firstly cutting a circle of plastic packaging slightly larger than the central hole of the ring and embossed this with Cuttlebug musical folder. I then inked it with Adirondack Watermelon and Butterscotch alcohol inks.
I cut an even larger circle of vintage music score and stuck this to the whole circle (this is the back of the wreath), then added the embossed panel using small pieces of tape round the edges so that it didn't show in the ring aperture.
I printed out the robin and some spruce which I re-sized slightly to fit my design - I dropped them all into a Word document as I find this the easiest way to print out multiple images. I then cut them out and inked the white portions of the spruce with green ink.
I assembled the wreath as you see, sandwiching some rustic twine between the 2 layers as a hanging loop then adding some bows and tiny roses to embellish it and cover up some of the gaps. As a finishing touch I then gave the spruce a coating of glitter glue and added a sprinkle of Distress Stickles Rock Candy dry glitter for some frosty sparkle.


Have a great day and hope you have a little sunshine as we do here at the moment.
Hugs, Fliss xx

Some challenges for my wreath:
Corrosive Challenges - Flutter By
Dream Valley Challenges - Anything Goes
Glitter n Sparkle - Things With Wings
Divas By Design - Anything Goes

Saturday, 3 November 2012

The Lonesome Pine

Hello everyone, today is a special day for me as it's my birthday! Won't be sharing my age though as I've got to the stage of wanting to forget about it lol.
We're off to see Skyfall tonight and I can't wait as I love James Bond films and it's been too long since the last one. No meal out today as the film is an awkward time so I hope we'll do that sometime soon. I'm planning on some crafting today and also will be sorting out some goodies as candy is rather overdue.
I have a project to share with you that is my inspiration for today over at Studio 12 Creative Team.
My decoration started life as a rather cheap wooden whitewashed rustic style heart (from The Range) and after the makeover, here's the finished result - ta da!


It was quite difficult to photograph the heart hanger to show the full sparkle so there's a second pic with the tree detail so you can get the full Frantage effect of the stunning embossing powders I used here. A bit of the sparkle does show but I was a bit light challenged!

I gave the heart a wash of very watered down periwinkle blue and sage acrylic paint and when dry, dry brushed on a little antique white. Because I used a wash, the original wood still shows through to add loads of texture.
I then got to work with a Versamark ink pad to add streaks on the raised areas, sprinkled on the amazing new Ranger sticky embossing powder, heated it to melt and then added Ranger clear Rock Candy dry glitter which sticks to the embossing powder like magic. The photo doesn't really do justice to the amazing sparkle you get so you'll have to trust me there!
I then printed out one of the pine trees from the Gingerbread Twist Cd twice on to strong card and cut out one whole tree and alternate sections of the second, starting at the top.
I embossed the complete tree with Frantage Aged Green embossing enamel and the sections with Aged Silver. Just one coat is all you need for this effect. I then glued on the silver sections over the top of the corresponding green sections as shown in the photo.
I altered some snowflakes which came from a pound shop snowflake garland using Pear Green and Amethyst Promarkers to add a little colour and glued everything in place on the altered heart.

Hoping you have a lovely weekend.
Hugs, Fliss xx

PS: I listened to the Skyfall theme by Adele on You Tube last night and it's amazing so do listen if you get a chance - probably the only song from the lovely Adele that's been Bonded up!

Some challenges for my altered heart:
Christmas Stampin' All Year Long - Anything Goes
Crafty Catz - Add Texture
Delicious Doodles - Embossing - Heat or Dry
The Stamp Man - Emboss It

Wednesday, 10 October 2012

Feeling A Little Bit Retro

Hello everyone, I'm hoping this post pops up as scheduled as I'm on my way to do a Sage book-keeping test for some more work which I have to confess I'm dreading as it's like being back at school lol
Anyhow, enough of my troubles and on to the mixed media project I'm sharing today at the Studio 12 Creative Team blog which is a rather retro style canvas board.
This came about as I was thinking back to my childhood recently and one memory jumped out at me. It concerned my Mum who was quite a dressmaker and she used to make clothes for me and my sister. I have a very clear memory of being really annoyed once because she made us each a frock in the same fabric but different colours. Mine had orange, pink and brown flowers and with my blonde hair, I knew even at the age of 10 that it didn't suit me!!! I have a feeling I made quite a fuss too!


I painted the canvas board with a mix of turquoise and light blue acrylic paint and then used a rather funky retro flower stencil (Crafters Workshop) and some light orange paint to add the flowers at the top of the canvas.
I printed out the mannequin from the All Sewn Up collection on the Studio 12 Picknix Collection 1 CD onto kraft card and cut it out. I then turned it over to the reverse as I didn't want the black lines and inked it with brown. I dry embossed some lines and rounded it out to make it look more 3D using a large ball tool.
I then printed a further mannequin on white card and using the outline as a pattern, drew a sixties style shift dress. I turned it over to the reverse and stamped on flowers from the Polka Doodles Daisy Doodles stamp set with pink, yellow, orange and brown.
I added a light orange die cut and embossed mat to the canvas and stuck on the mannequin and frock. I then added the die cut sentiment from the same CD and finished off with a variety of toning flowers, layered up and decorated with metal, pearl and jewel brads and some pearls.

Have a great day.
Hugs, Fliss xx

Some challenges for my canvas
The Craft Room Challenge - Alter It

Sunday, 23 September 2012

She Was Born To Dance

Hello folks, hope you're all having a good weekend with some sunshine which we had here although there is a distinct Autumn chill in the air now so I'm all layered up so I don't have to put the heating on.
Today sees the start of a new challenge over at Fashionable Stamping Challenges and this fortnight our theme is Alter Something so I took the opportunity to transform a white washed wooden heart that I bought on a trip to Arundel in one of my favourite shops called Sparks Yard. I also wanted to use a set of stamps by Lindsay Mason that I acquired when I went to The Craft Barn in June - her Off The Wall collections are really quirky and I fell in love with this one as well as another which will be appearing on here very soon.


The pic underneath shows the before and I painted the heart with several coats of pink acrylic paint before stamping on it with my Millefiori Stamping Technique (link on side bar) using pink and lilac inks with the Rubber Stamp Tapestry summer mums set of peg stamps.
I then stamped Arabella, the butterfly and text from the set with black ink on white card and coloured the images with various Promarkers. I cut them out to leave a narrow white border.
I used a Paper Artsy stripe stamp and black ink to make the striped border, colouring the white spaces with a lilac Promarker and glued this to the heart with a black lace border created with the Tim Holtz vintage lace die set.
I added some Marianne Design die cut flourishes cut from black and lilac card and coloured the text with a blossom Promarker.

The Design Team have made some absolute stunners for your inspiration so do hop over for a peek. The results for the last challenge will be out on Tuesday and I have to say we've had some amazingly creative and gorgeous entries proving the good things definitely do come in small packages.

Have a lovely Sunday.
Hugs, Fliss xx

Some challenges for my Heart Hanger
Stampin' For The Weekend - Feeling Floral
Totally Papercrafts - For A Child
Little Miss Muffet Challenges - Anything But Square
Inky Impressions Challenges - For A Child
Anything But A Card Challenge - Anything But A Card

Sunday, 2 September 2012

Cinnamon Tea Anyone?

Hello folks, hope you're all having a great weekend. I'm here today with news of yet another giveaway over at the Studio 12 Creative Team blog to celebrate the launch of the Studio 12 Picknix Collection 2 CD - Gingerbread Twist and if you haven't guessed from the name, it's all about Christmas!
The CD launched yesterday on Create & Craft TV and was a massive success as always - if you were watching you might have seen my creation below so do read on if you'd like to know how I made it.


I started off with a blank shadow box which I painted with blue acrylic paint. I then printed off one of the gorgeous holly design papers on to tissue paper. If you haven't done this before, it's quite easy as all you need to do is dry iron a piece of white tissue paper around 3cm all round larger than A4 then attach this to a piece of thin card, wrapping it round the back and securing with tape. Just be careful about getting it as flat as you can so it doesn't catch in the printer.
I attached the printed tissue to the frame with Ranger Glue and Seal and rubbed paint round the edges.
I then printed out a variety of the images inspired by the sentiment which says "Come to my table and share with me gingerbread, cookies and cinnamon tea" - I think this is just lovely and perfect for the kitchen.
I covered the inside of the frame with some of the gorgeous distressed look gingerbread man paper then added the cut out embellishments which I rounded out with an embossing ball tool before adding with foam tape.

The Creative Team have more really gorgeous creations to show you so do pop over and enter the giveaway, there's always a fabulous prize and it's very easy to try and win it.

Have a great day and see you tomorrow with news of the first September challenge at Make My Monday as we're back and raring to go after our Summer break and you're going to love the new challenge theme!
Hugs, Fliss xx

Challenges for my shadow box:
One Stop Craft - Time For Tea
Jellypark Challenges - Quench Your Thirst

Wednesday, 29 August 2012

Flowers Feed The Soul

Good morning folks, it's my turn to post today over at the Studio 12 Creative Team and my project is an idea for a special gift to make for a friend which is really easy to do. It's something which the recipient could easily add personal mementos, photos or little notes to and could be hung up in the kitchen, bedroom or craft room (those lucky enough to have one lol)


The base for my project is a pretty wire frame painted cream that came from The Range.
I made some little square collages to fit in the clips by resizing some of the pretty papers from the Heavenly Garden Kit on the Studio 12 Picknix Collection 1 CD down to 5cm. I then dropped them all into a Word document along with some hearts from the Welcome Home Kit on the CD also resized to fit on the paper squares. I printed this all out on to linen card for texture.
I cut everything out and made the elements into mini collages, embellishing with pressed flowers and leaves from my stash and inking all the edges of the squares with brown ink.

I added a pretty grungy sentiment from the Heavenly Garden Kit and made an embellishment by gathering up a piece of cream scalloped cotton lace to make a flower shape and fixed it to the frame with a jewelled brad through the centre.

Hope you're all having a good week so far and that you have a lovely day.
Hugs, Fliss xx

Challenges for my creation:
Challenges 4 Everybody - Anything Goes
Robyn's Fetish Challenge - Anything But A Card
Allsorts - It's A Gift
Everybody Art Challenge - Anything Goes

Sunday, 29 July 2012

Stitched With Love

Hello folks, I'm here at this early hour (scheduled tee hee as not up!) to wish Fashionable Stamping Challenges a very Happy First Birthday. I can't believe it's now a year since the challenges begun so it's true that time flies when you're having fun!
To celebrate our challenge theme for the fortnight is Anything Goes and I actually found this more difficult than having a set theme. However, I was looking for something the other day and came across a background I made a few months ago and inspiration struck.
Here's the result which is an altered shadow box.


The background I made uses a technique I learnt several years ago from the lovely ladies of Magenta and it gives a look similar to Florentine Bargello embroidery. I made strips of decorated paper using Distress inks (too many to list here!) and then stamped on them with more Distress inks and various floral, leaf and dot design stamps. I then assembled the strips into the pattern you see and added stamped splatters for an aged effect. The design was inspired by a patchwork quilt I saw.
I then painted a grungeboard flourish with orange acrylic paint and stamped on a grid design with Stazon Pumpkin ink. I die cut a Tim Holtz dress form from kraft card and stamped a Kanban lace design on the body section with Archival Coffee ink. I dry embossed some ridges for definition and inked with umber ink.
I die cut a shaped mat for the dress form with the Tim Holtz baroque die and Sissix Tim Holtz Kraft Core card. I embossed the shape with a Sissix rose folder and then sanded some of the raised areas to expose the kraft core.
I stamped 3 lace corners (Personal Impressions) on white card with the coffee ink and then inked these with Antique Linen Distress ink and cut them out. I stamped the text (Creative Expressions) on kraft card and die cut this with a Papermania label die.
I painted the box frame with avocado acrylic paint and then stamped with a button border and green ink.
I assembled it as you see embellishing with various buttons, pearls and a ribbon flower. I was aiming at a rather retro/vintage look so hope you think I've achieved it here.

The entries for the messy and inky challenge were amazing and we can't wait to see what you come up with for this one. Don't forget to stamp though, as this is what our challenges are all about. You also should check out the Design Team inspiration as my DT sisters have made some stunning creations.
Have a great Sunday.
Hugs, Fliss xx

Challenges for my altered shadow box:
Simon Says Stamp & Show - Hey Girl (inspired by my fashion designing daughter)
It's All About Vintage - Anything Goes
Simon Says Stamp - Anything Goes
Sarah Hurley Challenge - Alter Something
Crafty Creations - Buttons

Tuesday, 18 May 2010

Butterfly Plaque

Well here's my second post today with my finally finished entry for this week's Play Date Cafe challenge set by Sarah with these colours below to use on your creation:
It's such a lovely photo and gorgeous natural colours even though it's actually peeled paint that I decided to go with nature and have made a round plaque to be hung on the wall or displayed on an easel.
The plaque is made from part of a box which I wanted to recycle as the card is quite thick and ideal for this sort of thing.
I inked all around the edges with VersaColor Lime and then stamped on a small Anna Griffin rose in VersaFine Olympia Green to make a textured looking edge. I then cut a circle of pale blue card and stamped a large Rubber Stampede flower all over in lime and green tea inks. I stuck this to the plaque.
I then stamped the smaller butterfly from Stamp Scapes 14B Butterflies on pale blue card with the VersaFine ink and embossed it with Crystal powder. I cut it out and embossed on the reverse with a large ball tool to make the wings curve.
I stamped one more flower and cut it out, embossed on the back as for the butterfly and stuck over the central flower on the plaque with foam tape. I then stuck the butterfly on with foam tape.
Many thanks due to my dear friend Brenda for pointing out that this fits the May challenge over at Sir Stampalot so I'm entering it in that too.

Monday, 29 March 2010

Altered Wooden Stamp Block

Happy Monday everyone and hope you all had a good weekend and managed to get some crafting done.
I've been doing some altering using a wooden stamp block as the base. I took the original stamp off some time ago and put it on Ezimount as the block was much too big for the stamp and made positioning very difficult.
As the block stands up well by itself, I decided to make a double sided piece of artwork for variety.
I'm entering it in the following challenges, both with a theme of altering or recycling:
Allsorts Challenge and also Tuesday Taggers Challenge
 Ingredients Used:
The Lady with Veil photo stamp came from Ali Crafts-she's called Maude and is by Stampsmith ( thanks to Sally for letting me know the make are due here).
The Lady with Roses I've had for a while and can't remember the make but will add if I can find it.
Rose by Time to Stamp, Ornate Shape by Artemio
Ranger Distress Inks-Victorian Velvet, Scattered Straw, Mustard Seed, Peeled Paint, Worn Lipstick, Spun Sugar and Vintage Photo
Stewart Superior Palette inks-Belle Rose, L'Amore Red, Boudoir Blush, Black
Vintage Pink Glimmer Mist 
Cuttlebug Folders, Victoria, Textile, Organic Flourishes Borders
H20 Paints in Rose Gold and Gold Dust
Flowers and Roses
German Gold Scrap
Martha Stewart Lattice Border Punch
Acrylic Paint in gold
Coral Accent Beads
This is actually quite simple to make. The Cuttlebug embossed panels were sponged with the Distress inks and then spritzed with the Glimmer Mist. The stamped panels were stamped with the Palette inks and then sponged with Distress inks.
The photo stamps were stamped on semi gloss paper with black ink and sponged with Distress inks to colour when dry.
The rose lady panel was stuck to a slightly larger panel of double sided adhesive film and Accent Beads added to make a frame.
The veiled lady was stuck to a panel embossed at the base with one of the organic flourish borders. This side was finished with flowers altered with the H20 paints.

Thursday, 18 February 2010

AiFactory Challenge 24 - 3D

Morning everyone, over at AiFactory Challenge this week the challenge is to make a three dimensional project and the DT were all challenged to make something with Mia' s downloadable vintage calendar - anything except a calendar!

This made everyone think outside the box and really brought out the creativity. Here's the wall hanging that I made with it using just some of the birds from the decorated top section.


I've inked my tags with Peeled Paint and Broken China Distress inks and then applied Vintage Photo using a kitchen scourer-yes, really! It gives a speckled effect rather like birds eggs which fit my theme perfectly.
I then applied torn papers and collage elements together with the cut out birds. I painted some Basic Grey chipboard letters with copper metallic acrylic paint and added these to finish the tags. I tied on some twisted paper string and attached the tags to a stick with this.

If you click on the names on the side bar under AiFactory DT you can see what the others have made and there's some fabulous creations there. It's incredible how many different things can be made from one item.

Check out the challenge too on the Challenge blog (link above and on sidebar).