Showing posts with label Collages. Show all posts

Friday, 25 September 2020

Vintage Patchwork for That's Crafty!


Hello!

As promised I'm trying to do more blogging as I've been so bad at things lately (and in fact have a now huge catch up on Instagram due very soon as I'm even further behind on that!)

The artwork above is my post this week over at That's Crafty! Blog where I'm sharing my vintage style patchwork of inchies, twinchies and dominoes.

 Hope you like it and will be round to visit soon.

Have a great weekend.

Fliss x

Friday, 6 December 2019

Long Time, No See!

Hello everyone!
Just realised it's an absolute age since I last blogged everything and don't know where the time has disappeared to. I've been so busy with various things again and trying to keep up as I used to has been really difficult.
I finally have the house to myself again for the first time in nearly 2 years as my elder child moved out again last Sunday having finally gained a permanent job rather than a contract based one since being made redundant at the beginning of last year. I have to say it feels a bit weird getting used to it again!
The moving out actually coincided with the Indigo Blu Dirty Weekend in Brighton last weekend which I was lucky enough to attend, spending the first day with Leonie Pujol and the second with Kay Halliwell-Sutton. I was really lucky to meet 2 celebrities too, Julia Watts who demos on Hochanda for various companies and Alex Turchyn who's one of their presenters. Both of them were creating along side us. Had a fabulous time and got very messy!
I created the triptych with Leonie and the altered cabinet with Kay. Hope you like them.


I'm over at That's Crafty! Blog today with a couple of frosty Christmas cards that I actually created for the July Hochanda shows (rather than me as I'm still working on mine!) You can find all the details on the blog.


Here are a few more of my creations that you may have missed as they didn't appear on here!


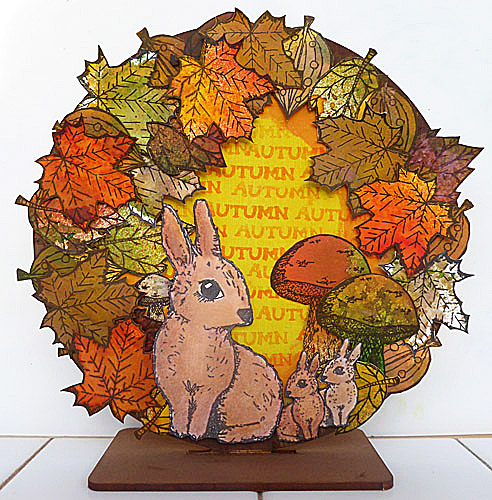
As you can see, there are a lot of bunnies which is because I was lucky enough to get this gorgeous stamp set to create samples with and I just love it! I couldn't stop creating with it!

Hope you're all well and I think my New Year resolution has to be to blog more often as my poor blog has been very neglected this year.

Best wishes.
Fliss x

Friday, 12 July 2019

Catching Up!

Hello, I hope you're all well and sorry for the lack of blogging lately. I've been very busy again with accounting and VAT work, making samples for Hochanda shows (One Day Special last month and shows last week) plus still doing things for my father in law whose progress is quite slow. He comes to us every Sunday for lunch and I still do his shopping and various other stuff too.
I'm over at That's Crafty! Blog today with a rather frosty mixed media collage which I created for the shows last week - these were part of Hochanda's 12 Days of Christmas - and it was very odd making Christmas cards in a heatwave I can say!
This one is more wintery than festive and a tiny bit steampunk as if you look closely at the snowflake, you'll see the quirky spanner heads.


I also forgot to share the post for last week and this one is more than a bit steampunk, featuring the same bird and if you read that post plus this one, you'll see where the snowflake appeared on both.


I won't be around next week as on Monday quite early we're off on our travels, going to our long awaited holiday in Norway a very long way down a fjord and I'm starting to get rather excited!

See you when I get back.
Fliss xx

Sunday, 17 September 2017

ITAC17 Challenge 2 - Asia (Oriental Girl)

Hello, I'm finally here to share my creation for ITAC17 and Challenge 2 which is Asia. I have to admit to a bit of a struggle with this one as I don't have very much that fit the brief which is why it took me so long to get this one done!
I did have some origami papers and some Japanese handmade paper along with an oriental newspaper picked up years ago (no idea which country it is either so I had to pick text ftom the ads as I thought that would be safer lol)
I've made a collage with the things I did have which I'm a bit iffy about but I hope you like it.


The starting point for my collage was the mandala shape which I created by using the That's Crafty! Big Floral stencil (one of my favourites) with Christmas Red Multi Surface paint on a piece of gold and yellow origami paper. When it was dry, I trimmed out the mandala shape.
I next took a scrap of the Japanese handmade paper and added some gold embossing to this. I painted my MDF panel with black and charcoal shimmer paints and when it was dry, glued on the gold embossed paper, a couple more origami paper, some scraps of newsprint oriental text and finally the mandala.
I found the oriental girl after an internet search, printed out the photo and trimmed her from it, adding her to my collage. The final touch was to add some gold heat embossed stamping using images from the AALL and Create stamp set 10 by Autour de Mwa.

If you click on the link above, you'll find all the challenge details as at the moment there's still time to enter and I need to get a move on with the next one!
Fliss xx

Monday, 20 October 2014

More Spookiness!

Hello, guess who's late again with her post for the new challenge this week at Make My Monday. Teamie Joan has chosen the theme of Halloween as the spooky date is drawing near.
I had to go mostly digital for my inspiration due to the lack of actual Halloween stamps and I hope you like what I created.


I've used some Halloween images from the lovely June of Dezinaworld before she had to close down her online shop due to various difficulties and it's a real shame as you can see from the beautiful main collage image which is a favourite of mine.
I used background papers from a Polkadoodles Halloween download pack and used one for the background and 2 more to make panels as you see. I then assembled everything adding the cut out pumpkin and cat from June together with the bird (in black to resemble a raven) and cage die cuts by Sit Tim and cut from black paper.

I hope you can join us as we'd love to see you entering.
Hugs,
Fliss xx

Friday, 24 May 2013

Wish You Were Here For That's Crafty

Hello everyone, firstly many apologies for not visiting as much recently. This is because I've been helping my daughter with her final collection, had a workshop to run on Monday, book-keeping work to do, an interview yesterday afternoon and today I'm in Kingston all day! No rest for me yet!

I promise I'll be round over the weekend but now I have to tell you about my project for today over at That's Crafty which is a seaside themed collage style card - if you haven't already guessed from the title!


The card features a background paper made during the workshop I taught on Monday and if you hop on over to That's Crafty, there's a photo of the whole piece of decorated paper before I covered it up and I promise you it looks very watery which is why I used the gorgeous seagull collage stamp.

Hope you like it and I'll be back later as today we have a new challenge for you over at Polka Doodles from Team B.

Hugs, Fliss xx

Friday, 14 December 2012

A Stitch In Time

Good morning folks, before I get on to the latest Polka Doodles challenge, I would like to say a huge thanks to everyone that entered my blog candy and to my new followers too. I haven't forgotten about posting the winners, I've just been up to my eyes in work this week having got behind because of my nasty chest infection. I'll be back tomorrow with the news so do keep an eye out for it.
Today we not only have a new challenge for you over at Polka Doodles with the most fantastic prizes (first prize is a £50 Goodie Bag!!!) but Nikky will be on Create and Craft at 10am and 4pm today to launch the gorgeous new CD which is called Cherry Blossom Lane and has the most adorably cute characters ever (those who know me will see why I love it when I can show you my samples) so do watch if you can or set the recorder.
The challenge this week has been chosen by Lou as her son will be 20 years old in a few days so the theme is
A Birthday At Christmas Card Or One For A Young Adult
I've made a card for one of my nieces with a birthday on 31 December as all the other birthdays this month -and we have quite a few- are either over 50 or less than 10!
Holly loves quilting so I've made a sewing themed collage style card for her.


All of the elements and papers on the card are from the Sundae of Seasons CD. I covered the card blank with some of the pretty ribbon stripe paper then added a blue panel of the same design trimmed at the top with a Papermania scallop cut and emboss border die.
I cut out the sewing machine topper with another Papermania die and hand cut a mat for this to make it pop.
To finish I added a die cut text panel and cut out the gorgeous pin cushion (I just love this and wish I had one like it lol) and some bobbins then added them with foam tape.

Have a great day and a lovely weekend and keep warm!
Fliss xx

Sunday, 7 October 2012

Autumn's Mellow Fruitfulness

Hello folks, hope you're all having a good weekend with some time for crafting. I'm wading through a pile of DT creations to get ahead and I'm here today with news of the latest challenge over at Fashionable Stamping Challenges which is something dear to my heart - Shades of Autumn.
I absolutely love these colours which you can probably tell as I've made several things in those lovely warm shades lately. It's a bit strange actually as I love looking at them but can't wear them with my blonde hair as they make me look ill lol.
Here's my creation for your inspiration which is all about the fruits of Autumn.


I stamped the beautiful bird and berries image (Joanna Sheen Giordano) with Archival coffee ink on cream card and coloured it with watercolour pencils. I die cut it into an oval panel and then inked round the edges with beige, pale pink and cinnamon. I made an offset mat for the panel by stamping a larger oval on one side with a Rubber Stampede maple leaf and Spiced Marmalade, Rusty Hinge and Aged Mahogany Distress inks.
I then made a background paper by sponging a square of parchment card with Mustard Seed DI and stamping on the maple leaf with Dried Marigold. I added faux stitching around the edges with a fine brown pen.
I made 2 embossed panels for contrast. The first is embossed with the Papermania Triboss gingko leaf folder and inked with Spiced Marmalade and Rusty Hinge DIs. The second was embossed with the Craft Concepts stitches folder and inked with Rusty Hinge and Aged Mahogany DIs.
I then made the leaf embellishment by stamping the maple leaf several times, inked up with Spiced Marmalade, Rusty Hinge and Aged Mahogany DIs. When dry, I cut them out and sponged on various Distress inks to give variation in hue, dipped each one in clear embossing powder and heat embossed.
I assembled the card as you see, adding pearls to the leaf spray to look like berries and the text was stamped with Hero Arts Pixie Letters upper and lower case with the coffee ink, inked with Mustard Seed DI and cut out.

We all look forward to seeing your beautiful creations and if you need some inspiration, the DT has some gorgeous artwork which you'll find HERE. Please also don't forget that we're a stamping challenge and no digis are allowed. To be eligible for the prize from Marina of Cottage Crafts or the top 3, we must see stamping on your project.

Have a lovely Sunday.
Hugs, Fliss xx

Some challenges for my card:
Card Crafters Circle - Autumn Colours
Card Makin' Mamas - Fall
Crafts 4 Eternity - Lots of Leaves
Crafty Catz Weekly Challenge - Autumn
Stempelsonne Challenge - Autumn

Wednesday, 29 August 2012

Flowers Feed The Soul

Good morning folks, it's my turn to post today over at the Studio 12 Creative Team and my project is an idea for a special gift to make for a friend which is really easy to do. It's something which the recipient could easily add personal mementos, photos or little notes to and could be hung up in the kitchen, bedroom or craft room (those lucky enough to have one lol)


The base for my project is a pretty wire frame painted cream that came from The Range.
I made some little square collages to fit in the clips by resizing some of the pretty papers from the Heavenly Garden Kit on the Studio 12 Picknix Collection 1 CD down to 5cm. I then dropped them all into a Word document along with some hearts from the Welcome Home Kit on the CD also resized to fit on the paper squares. I printed this all out on to linen card for texture.
I cut everything out and made the elements into mini collages, embellishing with pressed flowers and leaves from my stash and inking all the edges of the squares with brown ink.

I added a pretty grungy sentiment from the Heavenly Garden Kit and made an embellishment by gathering up a piece of cream scalloped cotton lace to make a flower shape and fixed it to the frame with a jewelled brad through the centre.

Hope you're all having a good week so far and that you have a lovely day.
Hugs, Fliss xx

Challenges for my creation:
Challenges 4 Everybody - Anything Goes
Robyn's Fetish Challenge - Anything But A Card
Allsorts - It's A Gift
Everybody Art Challenge - Anything Goes

Monday, 25 June 2012

Strawberries and Cream

Hello folks, I'm a bit late with my post today as I taught a workshop this morning and got behind on my preparations so had no time to do this earlier today. Many apologies to Jacqueline and the team for that.
It's time for a new challenge over at Make My Monday and continuing with the monthly theme of June and Associated Events what else could it be this week but Strawberries and Cream with the colours Red, Green and White/Cream as the theme.
I decided to take the challenge quite literally as you'll see from my card below:


I've used a jar stamp by The Artistic Stamper and a strawberry stamp free a while back with Craft Stamper Magazine. I stamped several of each image with Archival Coffee ink and then coloured them with Distress inks (Barn Door, Fired Brick, Peeled Paint, Mustard Seed and Vintage Photo) as I wanted a fairly realistic look.
I used gingham backing paper from the Polka Doodles All Around & Everywhere CD and a strawberry themed journalling card from the Studio 12 Picknix Collection 1 CD. I also used some heart shaped doilies for a tea time look.

So there you have it and the Design Team have made a widely varying selection of samples this week so do pop over for some great inspiration and you'll see how easy this challenge really is.

Challenges for my card:
Clearly Inspired - Red, Green and White
Craft Punked - Strawberries & Cream
Daring Cardmakers - You're So Sweet
Phindy's Place - Gingham or Plaid

Thanks for looking and have a great day.
Hugs, Fliss xx

Tuesday, 8 November 2011

The Key To Her Heart

Good morning everyone on a very dark, dull and cold day in the South of England. It's so dark that it feels like evening is on the way at 10.30 in the morning!
I'm here to share a project I've been working on for the last week in bits and pieces whenever I could find a spare few minutes. It's another collage as I really enjoy making those at the moment, largely because I can have a good rummage in my recycling box to find interesting bits to use.
Here's the finished artwork and underneath you'll find how it came about.


Here's what I used for the base


This is my favourite thing to use for a base as you can see from the second photo that it cut down into several interesting pieces. I just used a rectangle for my collage but the other pieces will be in use very soon.
I covered the base with a piece of torn edged vintage music score lightly inked with Spun Sugar Distress ink. I then added pieces of wide scalloped edge lace at the top and bottom to soften the effect. I punched holes at the top with my Cropodile and knotted ribbon through (the ribbon was from packaging on my pressies last week).
I stamped the large background (B Line Designs) on beige parchment paper and embossed with Ranger Tarnished Gold. I then sponged on Victorian Velvet and Crushed Olive Distress inks. I tore the edges and attached across the centre.
I made a further panel by stamping a Chocolate Baroque background stamp (recently won as part of lovely Claire C's blog candy - lucky me!), embossed with pale gold and sponged with Shabby Shutters and Tattered Rose Distress inks. This was then torn around the edges.
I stamped the lovely Maude by The Stampsmith with VersaFine Onyx Black ink on Judikins KromeKote card and tinted lightly with various Distress inks when it was dry. I then set this on the embossed panel, adding a silver key at the top attached with wire, a piece of chestnut velvet ribbon and a vintage jewellery piece.
I finished off with more lace at the bottom together with a jewelled butterfly and computer generated text. The final touch was the heart, hand cut from leftover music score, partially embossed and wiped with Brilliance Galaxy Gold ink.
The wide lace, silver key, vintage jewellery piece and the butterfly all came from one of June of Dezinaworld's fabulous treasure bags and I have tons of things still to use.

I'd like to enter my collage in the following challenges:
The Stamp Man - Collage
The Stampsmith - Ribbons and Lace
Sugar Creek Hollow - Trash to Vintage Treasure
Simon Says Stamp & Show - Upcycling/Recycling

Thanks for looking.
Fliss xx

Tuesday, 24 May 2011

A Home On The Range

Good afternoon everyone, hope you're coping OK with the current rather windy weather. We've actually had sunshine most of the day so it has at least been a little warmer.
I have a piece of artwork to show you made for Gingersnap Creations GC101 Chestnut Theme of Cowboys and Cowgirls. Not something we have here in the UK so I wasn't sure about it but decided to challenge myself anyway.
Here's the result:


I managed to find some really lovely images on Art-e-zine's vintage resources site where there are some fabulous vintage images and ephemera very kindly shared by a number of people.  The site is well worth a look if you're after a particular thing as there's a wide variety on there.
I decided that these 3 ladies look as if they belong on a ranch which was what in turn inspired the background. I was aiming for a log cabin quilt effect and thought these lovely K & Co papers fit the bill very well.
I then added a leather effect panel which was made by simply sponging Vintage Photo and Wild Honey Distress inks on leather texture card.
I set the vintage photo on a mat of the K & Co paper inked round the edges, then a torn corrugated panel rubbed with red metallic rub on.
I cut out a picket fence from corrugated card with the Tim Holtz fence die and added some pressed flowers.
I finished off with a butterfly and some text created with my Dymo machine.

Thanks for looking,
Fliss xx

Thursday, 27 January 2011

Dreamer

Good morning everyone, hope you're having a good week so far. I'm still in the middle of a pile of accounts work as the UK tax deadline is next Monday but I managed to get a couple of hours to myself yesterday afternoon so decided to do some crafting to relax my brain.
I also have several pieces of good news to share on the crafting front, the first of which was an email on Tuesday from the lovely Jill of The Stamp Man to say that I'm the very lucky winner of 2 sheets of unmounted Non-Sequitur stamps - yippee, how fantastic is that!!!
The second was when I popped over to The Craft Barn blog yesterday for a peek at a tutorial on using paper scraps (as my last card involved this) and found that not only is the tutorial fabulous, but that Michelle has used one of the flower stamps I designed - yay! You can see the tutorial if you click HERE and it's well worth a look as Michelle's use of her scraps is so creative.
The third piece of news is that this morning I discovered that my scraps card of the last post has been given a Ginger Gem Award so I really am on cloud 9 at the moment!. Thanks so much gingers, this means such a lot to me.

Now on to the piece of artwork I made yesterday which is actually in response to June of Dezinaworld's Spot Prize Challenge Beneath The Waves. Sadly, my glue took ages to dry and daylight went yesterday so I couldn't take photos until this morning so my entry is too late.
I have it here to show you anyway and happily this week's Wednesday Stamper is Inky Backgrounds, so I think this qualifies for that - you should see my inky fingers!!!


I decided to make a canvas and the background for the gorgeous vintage mermaid picture is made from a textured paper towel. I swiped it with Impress dye inks in shades of blue and green which were originally not as blended but when I glued the towel to the canvas with gel medium this caused the colours to mix with each other a lot more (and took a while to dry!)
I then stamped on the background with a flourish stamp to imitate seaweed. The stamp is from a clear set by My Paper World - Viva Decor which is available from The Craft Barn. I stamped it with acrylic paints in green, brown and bronze.
I tore the edges of the mermaid picture and then embossed them with copper and rust. I made the flowers to echo those in her hair by die cutting crepe paper (you can cut several layers at once) with a Nestabilities Blossom die. I layered up several flowers inked in pale yellow and green, scrunched them and secured with a brad then swiped them over Distress ink pads in Spiced Marmalade and Wild Honey.
I made the "seaweed" fronds by die cutting more crepe paper with a Sissix flourish die, inking with Vintage Photo Distress ink and embossing with a little clear powder. The flourishes curled a little and went translucent in places which give (I think) quite a realistic effect.
I'm really sorry to have missed your deadline June and will hopefully have more time next week.

Thanks for looking
Fliss x

Saturday, 24 April 2010

Mermaid Mixed Media Art

We've had a lovely sunny day down here in the South so I hope you've all had one too and are having a lovely weekend.
I have a piece of artwork to share that came about by one of my frequent serendipity moments. The piece has been made with the lovely mermaid digital image from Dezinaworld's weekly challenge run by the lovely June.
I'd been thinking about a suitable background for the mermaid for several days and yesterday managed to find a little spare time to experiment with some acrylic inks. I dripped the inks on to wet watercolour paper and then sprayed with some more water to make the colours move more. I put too much water on one piece and dropped on a paper towel to absorb the excess but when I pulled it off I found serendipity had struck as the paper towel looked lovely, the colour really brought out the texture. I sprayed it with Cosmic Shimmer colours of Ancient Copper and Golden Mint with a touch of Twilight Glimmer Mist.
I attached the paper towel to a piece of mount board with glue and tore off the excess round the edges. Using Diamond Glaze, I glued on some Mica Gold Flakes, Antique Bronze chips and an assortment of flower shaped sequins and some seed beads.
I printed out the mermaid and coloured her in part with Promarkers. I then painted her tail and hair with Twinkling H20 paints, just dotting the paint on her tail to get a scaly effect. I cut her out and ran the edge of a grey marker all around to make the image stand out. I glued her to the panel with foam tape and glue as I find this makes sure that anything attached stays put!
Finally, I had some really good news this week as I found out that the card I entered in Gingersnap Creations Copper, Ginger or Rust challenge has been picked as one of the Ginger Gems.  If you'd like to see the card, click here.

Saturday, 31 October 2009

Spooky Halloween Birthday

Firstly I'd like to say a big welcome to Julie who has just become a follower. Do check out her blog for some fab work and a gorgeous recipe for Apple Puff Pancake which sounds just heavenly.

It's my nephew Sam's 15th birthday today (where does the time go!!!) and I decided this year I would actually make him a spooky card for probably the first and last time. He's football mad so you can guess what I normally do.
Here's his card


The background paper is made from a piece of patterned paper that I altered with Spiced Marmalade Distress ink and then stamped on the brick pattern from my grunge backgrounds set by I Brake For Stamps from the Craft Fairy.
All of the images I used came from the Dezinaworld Halloween Collage Sheets and were cut out and collaged to the background with double sided tape and foam tape.
Many thanks to Cheryl on the Dezinaworld DT for the inspiration to get me started on this one as I'm more used to stamping than using lots of images but don't own any spooky stamps.