Showing posts with label Vintage Style. Show all posts

Saturday, 26 September 2020

A Return To Vintage - Raspberry Beret

 Hello again!

I managed to snatch a bit of much needed creative time just for me this weekend as I'd been looking for something and found something unexpected instead. As I've recently been working with the new small elements stamp sets and new stencils some of which are vintage in style and they're just perfect for the stamps I unearthed. I've had them all for ages and just had to play.


I stamped them all out first using VersaFine Clair inks in shades of brown, using smooth white stamping card that I got as a bargain from Hochanda a while back.


I had some inner panels spare from the frame shrines that I got to play with when Kelly's Steampunk Darlings stamps came out, so decided to use one of those. I painted it with chestnut brown multi surface paint and once dry gave it a coat of crackle glaze. Once it was mostly dry I over-painted it with a shade I mixed from several shades of multi surface paint - I used light pink, adding a little orange and magenta to produce a dusky vintage pink. As you can see, The crackle that came out was amazing!


The next step was to add some stencilled texture paste so I coloured the paste with some chestnut brown paint andd then used the gorgeous damask stencil to add a pattern in opposite corners. As it came out lighter than I expected, I lightly tapped the fully dry raised pattern with a dark brown ink and then heat embossed the pattern with clear powder.


I took my chosen stamped image and trimmed around the edges leaving quite a border. I wanted her to fit an MDF atc so left enough room round the image to add her to that with a frame on top. I stamped the frame with an image from the elements set above working my way round with brown ink and heat embossed the frame with gold embossing powder.


As you can see, she has a raspberry beret which I couldn't resist as that's one of my favourite songs from Prince - are you singing?
 
I then created some embellishments with craftyboard lace which I coloured lightly with Antique Linen oxide ink and then sponged with a touch of brown for a vintage look. I also stamped some MDF inchies with some of the images from the set and heat embossed these with gold powder. The colour's a bit off in the photo as they look brown but are actually gold!


I then assembled my collage using a mix of silicone and multi purpose adhesive and finished off with some text stamped with brown ink, heat embossed and trimmed into shape to fit.


I hope you like her and there will be more to follow once I get a bit more time to play.

See you soon,

Fliss x


Friday, 25 September 2020

Vintage Patchwork for That's Crafty!


Hello!

As promised I'm trying to do more blogging as I've been so bad at things lately (and in fact have a now huge catch up on Instagram due very soon as I'm even further behind on that!)

The artwork above is my post this week over at That's Crafty! Blog where I'm sharing my vintage style patchwork of inchies, twinchies and dominoes.

 Hope you like it and will be round to visit soon.

Have a great weekend.

Fliss x

Friday, 10 November 2017

Stencil It! at That's Crafty! Challenge Blog

Hello everyone, I hope you've had a good week and had some time for crafting as I have. It's been really great to have a bit more time to create as I do these days although some of it is still under wraps and can't be shared just yet!

We have a new challenge for you today over at That's Crafty! Challenge Blog where for the next fortnight, our theme is Stencil It! We would like to see you using at least one stencil on whatever you decide to make.

My inspiration is a mixed media art panel that I really enjoyed creating as my love of vintage has resurfaced due to wanting to use one of the fabulous Tim Holtz paper dolls, in my case a rather lovely couple.


I started off with an 8x8 MDF panel which I covered with a coat of white gesso. I then used the big floral stencil with texture paste to add a pattern on the left side. Once the paste was dry, I mixed white multi surface with a little red to make pink and also some white with a little teal and purple to make a soft blue. I then brushed the paints roughly over the panel to colour it.
I stamped some script across the top and partly down the right side. I used a Tim Holtz Mixed Media die to cut a pattern out of a piece of recycled corrugated card and then used it as a stencil to add a pattern on the right side with some chestnut brown multi surface paint mixed with white.


I dragged the corrugated panel together with some butterflies, leaves and leftover swirls from mixed media cut outs through the leftover soft blue and pink paints to add some shabby chic colour.


I next painted a size 2 MDF art panel with a coat of gesso. Once dry, I painted it soft blue and pink, adding reverse stencilling by brayering a little cream paint (white multi surface paint with a dash of yellow) on to the big floral stencil and pressing it on the panel to transfer the paint. I rubbed some of the diluted chestnut brown around the edges.


I asembled the panel as you see in the main photo, adding the affirmation from Lynne's Affirmations Set 6, stamped with Archival Potting Soil ink on a scrap of mixed media paper.

I hope you can enter as there's a prize of a voucher for the randomly drawn winner and there's tons of lovely goodies in the online shop.

Have a great day.
Fliss xx

Friday, 2 September 2016

All Square At That's Crafty! Challenge Blog

Hello and welcome to my inspiration gor the new challenge today at That's Crafty! Challenge Blog. This will be my last post for a bit apart from scheduled posts which I hope will pop up as planned as I'm off on my hols to Austria tomorrow and will be incommunicado as my phone doesn't have FB and the screen is not big enough for me to be able to see anything blog wise clearly enough!

When I found out what the challenge was the first thing that sprang to mind with the theme of All Square was patchwork quilt squares. Here's what I made and I hope you like it!


Do you like my patchwork squares? My hubby thought they were fabric when he saw the background paper I made. My treasured Tim Holtz Lady Rose has come out to play again, this time in rather vintage style.


The roses in the stamp set are gorgeous and lend themselves very well to repeat stamping which is what I did here using Archival inks in Fern Green and Plum, roughly inking up the flowers with the plum and the leaves with the green. I stamped on as many of the large images as I could fit then took the stamp off the acrylic block. I inked up just portions of the images with same same inks and filled in the gaps, holding the stamp in my hands and pressing down gently to transfer the ink.

Once I finished stamping, I coloured the images with a Spun Sugar and Crushed Olive Distress Markers. I then sponged Antique Linen Distress ink over the top and serendipity struck again! The sponge seemed to pick up some of the Distress marker colour and the result looked just like vintage stained fabric - how's that for luck!

I cut 4 squares from the paper and pierced holes around the edges with the Tim Holtz Idea-ology Ruler, creating the effect of stitching with the Aged Mahogany Distress Marker. I then stuck them on a square of double sided adhesive sheet (floating around in my stash for an age!). I left gaps between the squares and pressed Finnabair Art Ingredients Bronze Micro Beads on to the adhesive.

I added the panel to a square kraft card blank. I stamped Lady Rose on mixed media paper with the plum ink, colouring her with Paper Artsy Fresco Finish Acrylics. I trimmed the image to a square panel and inked around the image with Spun Sugar Distress ink. I then stamped around the edges with an image from the Tim Holtz Damask stamp set using the Spun Sugar Distress Marker to ink the stamp.

I distressed the edges of the panel with an emery board and inked them up with plum before attaching to the background panel. I finished off with some inked Big Chat stickers.

Have a great weekend and a lovely week and see you in a while.
Fliss xx

Monday, 2 November 2015

Shabby Chic At Make My Monday

Hello there from an exceedingly misty Woodstock (well, it is the season of mists and mellow fruitfulness!). I'm a bit late with this post as I'm away and have a rather dodgy internet connection but I wanted to let you know we have a new challenge today over at Make My Monday and you can probably tell I picked the theme as it's Shabby Chic which I'm sure you know how much I love.

Here's my inspiration which I hope you like as it's very vintage in style.


The background paper is a piece of rough watercolour paper which was coloured by pressing in Crushed Olive and Victorian Velvet Distress inks misted with water. I then used the same inks to stamp on a Hero Arts frond image.


I painted a panel of corrugated card with deep green acrylic paint and then swiped on some dusty pink when it was dry. I added the pretty vintage image (Dezinaworld) to the panel.
I glued the background panel to a pink card blank and added a central dry embossed border of pink card using the Cuttlebug Victoria folder swiped with gold ink. I then added a pink punched border over the top and glued on the corrugated panel.
I made a wire embellishment by twisting beads on to green wire to make a pretty spray which I glued on the card with a fabric flower and some Prima paper leaves to finish.


We spent a glorious day at Blenheim Palace yesterday which is a 5 minute walk from our hotel and I'll have some pics to share soon as the grounds are just gorgeous in their Autumn splendour and it was so warm and sunny it was more like September than November and was apparently the warmest November day on record!
We visited Oxford today and took in the dreaming spires, wandering in a slight daze among the incredibly beautiful architecture and went on a tour of the Bodiean Library where we weren't allowed to take photos and sadly the postcards don't do it justice so I will just have to keep the memory in my head - needless to say it was the perfect place to visit for someone who is often lost in a good book!

See you again soon with some of my pics.
Fliss xx

Monday, 27 April 2015

Vintage or Shall We Dance?

Hello all, I hope you had a lovely weekend despite the downturn in the weather which was a bit wet and not that warm either! I thought Spring had arrived but it seems to have hidden away again.
It's time for a new challenge today at Make My Monday and yours truly has chosen the theme of Vintage which I know won't be a surprise to those of you that know me well :D


I came across a stamp which had managed to stay in my stash uninked until now as it was hidden away and I found it whilst looking for something else (this happens to me quite often so, note to self - tidy up craft stash!)
The image is a Blue Moon one which I bought at a show because it combines 2 of my favourite things - collage and dance (I'm a big fan of Strictly). I stamped it on smooth cartridge paper and coloured the image with watercolour pencils, then cut it to a panel, trimming along the curved top edge.
I then made the background paper by using scrunched up cling film to apply Brilliance Pearlescent Beige and Galaxy Gold to a square of card. I then stamped on the Ornate Flourish (Inkylicious) with Brilliance Crimson Copper, stamping twice before re-inking.
I distressed the edges of the background paper and then added a little Tim Holtz Idea-ology tissue tape to this and a scrap of dark red card which I trimmed to shape to make a mat for the collage image. I glued everything to a kraft card blank to finish.

Have a great day and a lovely week.
Fliss xx

Friday, 6 March 2015

Spring Has Sprung at That's Crafty!

Hello everyone and welcome to my post today which is to let you know I have a shabby chic project to share over at That's Crafty made with my beautiful new Liz Borer stamp set by Paper Artsy which I was totally unable to resist as the stamps are so pretty.
Hope you like it.


As you can see it's a little wall hanging plaque and in my current favourite Spring shades of pink and green. All the details are over at the blog as usual.
I'm also almost falling asleep whilst writing this at 8.30pm as I had to attend an Auto Enrolment pension seminar as payroll duties for quite a lot of clients are part of my job and the amount to learn and take in was staggering and somewhat scary!
Roll on the weekend is all I can say!
Hugs,
Fliss xx

Monday, 23 February 2015

Tag You're It!

Hello folks, I hope you all had a good weekend and managed to fit in some crafting which is more than I did as we had family stuff going on again with birthday celebrations and so on.
It's time for a new challenge at Make My Monday and this week the theme is Tags. I had to cheat a bit with my inspiration as having had no time for crafting, I'm sharing something I made a few years back that I really like and I know I enjoyed creating at the time.


I made my own tag as I wanted an arch shape and I covered it with some decorated paper from my experimental box. It was sprayed deep red and stamped with a square design in black then some doodling with a gold leaf pen was added.
The Gibson girl was stamped with Memories Artprint Brown ink, coloured with pencils and cut out. I then cut a heart shape from card and covered it with pressed pansies.
The tag was assembled with ribbon and a butterfly from my vintage illustration book and the text was stamped with Hero Arts alphabet stamps and inked up with Antique Linen and Vintage Photo Distress inks.
The final touch was a pressed daisy in the lady's hair.

Have a great day.
Fliss xx 

Monday, 8 December 2014

A Little Angel

Hello everyone, I hope you had a better weekend than me as I had to work to finish something off so I'm not a happy bunny at the moment!
I did manage to finish off my card for our new challenge today over at Make My Monday so it wasn't all bad news :)
This week our theme is ANGELS so I decided to ink up for the first time a lovely vintage style stamp by Crafty Individuals. Hope you like my inspiration.


I stamped the angel collage with Memories Creamy Coffee chalk ink and coloured her with pastel shades of Aquamarkers. I then trimmed the image to a panel by hand and added it to a mat I created by swiping silver Encore Metallic ink round the edges and heat embossing with Winter Wonderland embossing powder.
I made the blue background paper by dry embossing paper with a Darice snowflake flourish folder round the corners and then inked it with Tumbled Glass Distress ink. I added this to a mat made in the same way as that for the collage panel.
I assembled the elements onto a card blank and stamped the Christmas greeting directly on the paper with the coffee ink.

Hope you can join us.
See you again soon,
Fliss xx

Friday, 14 November 2014

Vintage Style

Hello again, I'm back as promised with the details of our new challenge over at That's Crafty Challenge Blog which for the next fortnight has a theme close to my heart, VINTAGE.
Here's my inspiration which I hope you like.


Ingredients
Carabelle Studio Cling Stamp - Un Ange a Aimer
Crafty Individuals Flourish Stamp - CI-173
Cuttlebug Anna Griffin Embossing Folder -Floribunda
Stampendous Frantage Embossing Enamel - Aged Bronze
Archival Coffee Ink
Distress Inks - Antique Linen, Tattered Rose, Vintage Photo, Gathered Twigs, Tumbled Glass, Peacock Feathers, Fired Brick
Embossing Ink
Aquamarkers
Smooth Stamping Card
Kraft Card
X Cut Nesting Dies - Ovals - Large, Doorplate - Large
Doily

Recipe
1. Make the background paper. Cut a piece of stamping card to fit your card blank - mine is 8x8 because the angel is quite a tall stamp (almost 15cm including the wings). Ink up with Antique Linen and Tattered Rose DIs.
2. Use the flourish stamp and embossing ink to stamp a design in each corner of the inked paper and heat emboss with the Frantage enamel. Add the brown inks around the edges and on the embossed corners.
3. Stamp the flourish design over the paper with Tattered Rose and VIntage Photio without using an acrylic block. Do this repeatedly until you're happy with the effect which will be shabby chic like vintage wallpaper.
4. Stamp the angel and wings on stamping card with the Archival ink and colour with the Distress inks and Aquamarkers as desired. Cut the images out.
5. Dry emboss a panel of stamping card and one of kraft card with the embossing folder. Ink the stamping card panel with the pink and brown DIs. Inks a doily with the Vintage Photo.
6. Stamp the sentiment with the coffee ink and die cut with the smallest oval die. Die cut the second smallest doorplate from a scrap of card and stamp and heat emboss the flourish design with the aged bronze Frantage. Ink with the pink and brown DIs and glue on the sentiment oval.
7. Distress the edges of the background paper before gluing to the card and then glue on the remaining elements as shown.

Don't forget that the prize for entering is a £20 voucher for the online shop though please chack the rules first. Good luck!

Have a great weekend,
Fliss xx

Monday, 3 November 2014

Vintage Style

Hello there, I hope you all had a lovely weekend and enjoyed some sunny weather as we had a really warm Saturday with 22 degrees on the 1st November! Apparently cold weather is on the way though but I actually don't mind as long as it's not wet!
Over at Make My Monday we have a new challenge today with a theme chosen by yours truly and one which is close to my heart too, you've guessed it - VINTAGE


 I've inked up what I think must be my favourite image, the lovely Le Brun by B Line Designs which I found out a few months ago is based on a self portrait by a French lady artist of the same name. Her art is truly beautiful and so inspirational. I stamped the image on smooth cartridge paper with Memories Creamy Coffee chalk ink and coloured her with Prisma pencils then trimmed around the image on 2 sides. I added her to a shaped kraft card panel.
I then made a background paper by inking smooth card with Spun Sugar, Tattered Rose, Victorian Velvet and Vintage Photo Distress inks applied with an ink applicator. I stamped on a Stacy Stamps lace background design with the coffee ink, not using an acrylic block for a vintage shabby effect. I then cut an aperture in the paper with an X Cut die and will be saving the panel to use on another project.


I then die cut a trellis from kraft card with a Cheery Lynn die and made a background panel to sit behind it with antique cream card embossed with an X Cut rose folder.
I assembled the card with the embossed panel and die cut trellis sitting behind the aperture and added the image panel on the side, decorating with pearls. The finishing touch is a German gold scrap butterfly that has been in my craft stash for quite a while.
I left off a sentiment for the moment as I like to have a few cards that can be made suitable for several occasions.

Have a great day and a lovely week.
Fliss xx

PS: There will be candy soon as today is my birthday and I want to thank everyone who has been so kind in my recent difficult times.

Monday, 7 July 2014

Postcard From Paris

Good morning folks and welcome to my post today especially my new follower Annie - so lovely to have you on board.
We have a new challenge today over at Make My Monday which has the theme of Mail Art chosen by Suzi B who would like to see creations involving postcards, envelopes and so on.
I decided on a postcard featuring a real wish of mine which is to travel to Paris as I've never been there - my younger daughter is going there for the weekend in a couple of weeks as a friend of hers has been an au pair for the last year and as you can imagine I'm rather green!
My postcard has a rather vintage feel to it as you'll see.


I cut my piece of thick cartridge paper slightly smaller than 4x6 as I wanted to add it to a card backing for strength.
I then used sponge applicators to apply Distress inks - I used Spun Sugar, Shabby Shutters, Victorian Velvet and Crushed Olive. I then stamped on a rose from a Glitz Design set with the darker Distress inks and added Hero Arts Old French Writing with Crushed Olive.
I then stamped on the Stampendous Paris image with Memories Creamy Coffee and added the post marks from an Inkylicious stamp with the same ink. When the ink was dry, I added colour to the flowers with Polychromos.
I stamped the Lost Coast Designs Rose Boy with the brown ink and added a little colour with the pencils. I cut the image out and swiped it with embossing ink and heat embossed with clear powder. I did this because the image needed a little something to pop agains the background.
To finish off I stuck the panel to a 4x6 piece of kraft card.

Bye for now and have a great week.
Hugs, Fliss xx

Some challenges for my postcard:
Anything But A Card Challenge - Anything Goes
Paper Crafting Challenges - Anything Goes
Paper Creator's Crafts Challenge - Anything Goes

Friday, 4 July 2014

Going Steampunk For That's Crafty

Good morning all, hoping you've all had a lovely sunny week which has been so warm here and it's fabulous to be able to walk about in short sleeves at last.
As it's a certain date I'd also like to wish a very Happy Fourth of July to all of you in the United States - have a great day!
It's my That's Crafty day today and this week I'm sharing an altered arch frame by those lovely peops over at Tando Creative who make such wonderful and amazing value items crying out for ink or paint so this time I got very messy indeed and had purple fingers for a while!
I hope you like my tranformation and you'll find all the details of how I created it over at the blog.


If you haven't yet entered our latest challenge over at the That's Crafty Challenge Blog, you still have a week to enter your creations with a seaside flavour as the theme is All At Sea - why not give it a try as the winner is randomly chosen to be fair to all entrants.

Have a lovely weekend,
Fliss xx

Some challenges I'd like to enter:
Crafty Creations Challenges - Things With Wings
Altered Eclectics - Anything Goes - mine is an altered chipboard arch frame
Rhedd's Creative Spirit - Anything Goes Altered Art

Friday, 16 May 2014

Feeling Blue

Hello folks from a very tired Fliss as I've had a very busy time with work and stuff over the last couple of weeks practically falling asleep whilst watching TV yesterday. I'm definitely looking forward to the weekend and hopefully a bit of a rest..
Anyhow, enough waffle and on to the first post today which is to tell you about the project I have today over at That's Crafty which I was rather late in sending to poor Laura yesterday so apologies here for that!


You can probably see the reason for my title now as I decided to go monochrome with shades of blue for a vintage style card. All the deets are over at the blog as usual.

Back in a bit to let you know about the new challenge we have for you today over at the That's Crafty challenge blog and I think you'll love it too.

Fliss xx

Friday, 2 May 2014

Fairy Happy Birthday For That's Crafty

Hello everyone, hope you're all well and have had a good week. Mine has been really busy at work so you can guess who's looking forward to the Bank Holiday weekend.
My first post of today is to tell you that I have a project and tutorial on how I created it over at That's Crafty which I hope you like. There's also a little tip for making your own background paper which will save on time and ink so do hop on over if you'd like to see what it is.


Quite a girly card as you see as I'm trying to get ahead with the birthday cards I need in the next few weeks.

I'll be back a bit later with details of our new challenge over at the That's Crafty challenge blog and I just loved the theme and think you will too when you see what it is.

See you later!
Hugs,
Fliss xx

Monday, 21 April 2014

Distress It!

Hello there folks and a Happy Easter to you all. I hope you had a lovely time and didn't eat too much chocolate!
I'm here now with a slightly late post for the new challenge today over at Make My Monday which was chosen by former team mate Jan and involves one of my absolute favourite techniques - Distressing.
I have a tutorial to share too, so that you can see how I turned something that has been in my stash for many years, unused as I tend to prefer stamping but this is all about how you can make a humble Peel Off look like it isn't a peel off! I think I'll be using this technique quite a lot too and you may need a cuppa before you read on although I promise it's not too long.


The finished card is above and you'll find the background paper steps below.

Step 1

For this you need a piece of smooth thick paper or watercolour paper cut to fit your chosen card blank and some peel offs. I chose corner ones but you could use flowers or patterned peel offs to make a frame shape.


As you can see, I placed the peel off in the corners of my paper.

 Step 2

For this step you need some gesso which I brushed roughly all over. You don't have to be precise with this as it gives a better shabby chic effect if the coverage is quite textured.


Step 3

This step takes the most time. You need some Distress inks - I used Tattered Rose, Wild Honey and Frayed Burlap. I applied the 2 lighter shades with a sponge and then added just a touch of the brown which you can see inked the rougher areas more. I then stamped a pattern design (Kaisercraft Lattice) all over with the Wild Honey to add more texture.
I heat embossed the paper with clear detail embossing powder. I distressed the edges and the peel off corners gently with an emery board and added Vintage Photo Distress ink round the edges.
If you click on the photo below, you'll see that sanding some of the paint off the peel offs gives them a rather distressed look like rusted metal.


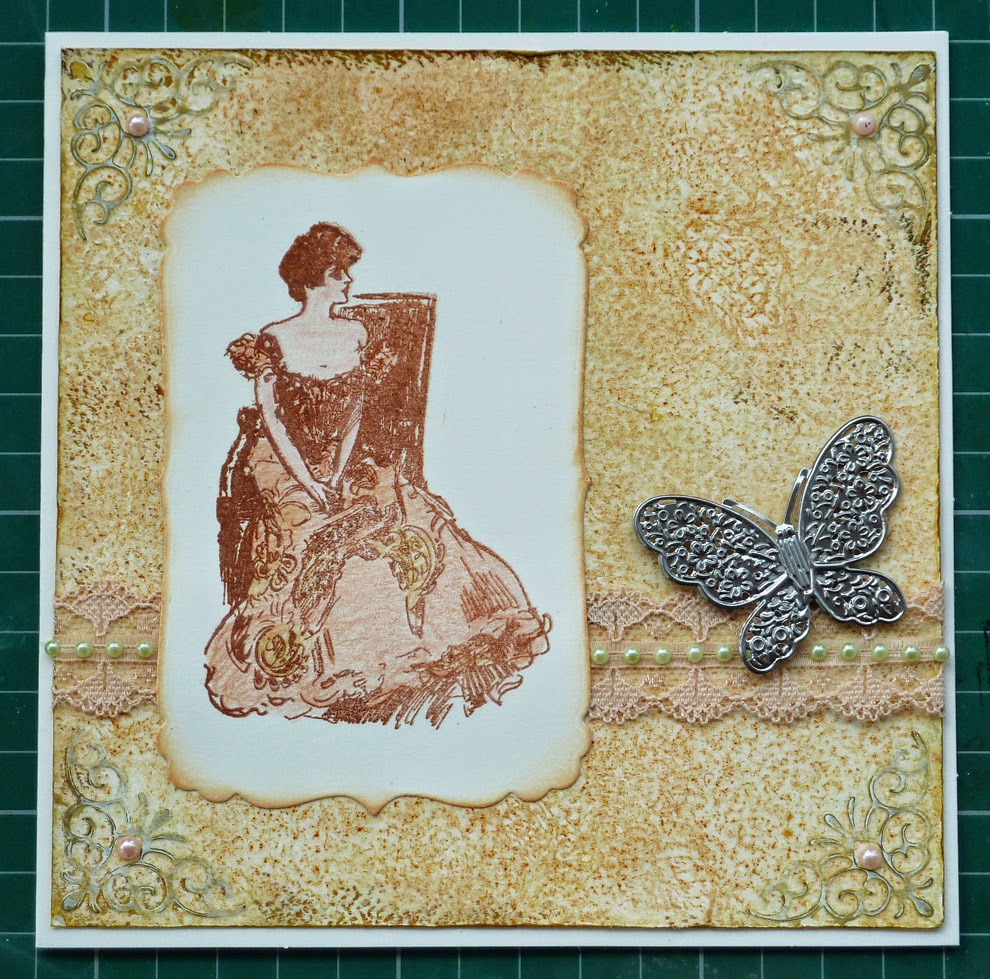
As you can see on my card above, the addition of some pearls and lace together with the filigree butterfly and the lovely Gibson lady (Flonzcraft), the paper gives a soft vintage feel.

Hoping that you like this and please do let me know what you think.
Hugs,
Fliss xx

PS: I'd also like to enter my tutorial in the current Mixed Media Mayhem at Quirky Crafts Challenges as you can see from the card and tutorial quite a few things came into play. Hope that's OK with you ladies :)

Friday, 21 March 2014

Imagine

Hello there folks and a special welcome to my new followers. A real pleasure to have you on board and I really appreciate you choosing to join me on my art journey.
This is my first post of the day to let you know I have a project today over at That's Crafty which is a vintage style creation made with the help of my treasured Stampendous Creative Palette.


You'll find all the details over at the blog with a tutorial and materials list and I'd love it if you'd pop over especially if you haven't yet done so as we have loads of fab tutorials for you so it really is worth a visit.

We had an absolutely astounding number of entries for our first challenge over at the That's Crafty Challenge Blog and if you hop over later today, you'll find all the details of the second challenge along with lots of gorgeous inspiration for the theme which is one I love and I'm sure you will too.

See you a bit later on.
Hugs,
Fliss xx

Friday, 7 March 2014

Style Is Always In Fashion

Hi there and welcome to my first of 2 posts today which is to tell you about the project I have for you over at That's Crafty which features a gorgeous background stamp which I've used to make not only the background paper but decorative panels and matting layers as well - you can really get your money's worth from this one!


To find out how I made made all the layers, please do hop on over for all the details.

I'll be back a bit later on with my inspiration piece for our first challenge at the brand new That's Crafty Challenge Blog and don't miss this because there's a fab prize up for grabs if you enter.

See you later!
Fliss xx

Friday, 21 February 2014

La Vie Scientifique For That's Crafty

Good morning folks, I hope you've all had a better week than mine as my journey to work has been fraught with difficulties all week due to local flooding and burst water mains combined with roadworks! I really hope things improve soon as I'm getting very fed up with all of it!
Anyhow, enough of my troubles and on to my reason for today's post which is to tell you about the project I have over at That's Crafty which is a creation with another of the papers I made last week in my mono printing session with Stampendous Creative Palette and I've gone steampunk this week!


You'll find a pic of the whole creation over at the blog with all the materials details and how I made it and I'd love it if you came to visit.

Have a great day and a lovely weekend.
Hugs,
Fliss xx

Monday, 13 January 2014

Watch The Birdie!

Hello there everyone and I hope you all had a good weekend. It's time for a new challenge today over at Make My Monday with the theme of Birds which is another favourite of mine so many thanks to team mate Rosie for choosing it.
I had a rummage in my bits box for some background paper to go with the image I wanted to use and I hope you like the one I decided on.


I've gone all Stampendous for the card as I just love this cute little chap that I decided to turn into a little blue tit - can you tell how much I'm longing for Spring? I stamped the collage on Ranger manila cardstock with Archival coffee ink and then coloured it with Aquamarkers. I inked round the edges and added a buff coloured matting layer.
The background paper was made with the Stampendous jumbo rosebuds stamped with VersaFine Smokey Gray ink on a piece of hammered texture card. I then rubbed dusty pink and yellow VersaColor ink cubes over the top. Because the card is textured it gives a lovely mottled effect. I then added a little extra colour to the flowers and leaves with pencils.
I assembled the elements on a kraft card blank.

I hope you can join us this week.
Have a great day,
Fliss xx