Showing posts with label AiFactory. Show all posts

Saturday, 8 May 2010

AiFactory Blog Hop - You Say Goodbye, I Say Hello

Morning everyone, today's the start of AiFactory's Blog Hop to say goodbye to some of the Design Team and welcome the new members. Just read on for the fabulous prizes if you do the hop and leave comments on everyone's blog hop post.

We've all been given some of Mia's new images to use and mine is the cute Rock Climbing Digital Stamp Set and here's what I made:

I made a gate fold card using a rock background paper which I made myself from a holiday photo of the inside of a cave. I experimented by using the poster option on Photoshop and was thrilled to bits when it turned the rocks gorgeous shades of purple, pink and green (the original was a rather boring brown!).
I printed out the cute little boy and girl climbers and the ropes in the set, coloured them with Promarkers and cut them out. I arranged them on one side of the gatefold and added text to the other.

I'm sure you'd like to know about the prizes and how to get them so here's the all important information:
Prize 1 ~  Drawn from random DT Members comments $20 Gift Certificate. All you need to do here is make sure you leave a comment on each of the blogs you visit to be in with a chance of winning this.

Prize 2 ~ Scrambled Word Prize...Each DT Member has been assigned a letter (mine is T) and to be in with a chance of winning here, you need to collect all the letters and unscramble them to make a phrase. You then need to email the answer to angievcortes@gmail.com and she will be drawing a winner for a $10 Gift Certificate.

Prize 3 ~ There are also random freebies scattered throughout the hop provided by Mia so you need to keep hopping to find those.

You should have come here from Cheri's blog but if you didn't then go to the AiFactory Challenge Blog to find the hopping order.If you did come from Cheri then the next blog in the hop is
Brandy so pop on over and give her a welcome to the DT.
Good luck and happy hopping!

Thursday, 29 April 2010

AiFactory Challenge 34 - Buttons

It's Thursday again so it's time for the next challenge over at AiFactory and this weeks' theme is to use buttons on your creation.
The Design Team were given some lovely images to play with by Mia, the gorgeous and cute Baby Pram digital stamp and the Baby Line Set.

 I was asked to make something with the sweet pram image and decided to go for an easel shape card again and here's what I made
I made the easel shape with cream card and rounded off all the corners. I added a patchwork pattern of little squares of Basic Grey Lemonade paper as I wanted a slightly stronger pastel combination. I repeated the squares across the base.
I added a plain piece of paper at the top, embossed with the Cuttlebug Kimmy Luvs folder in the centre. I glued 3 heart buttons on each side. I printed out the pram image and coloured it with Promarkers. I cut it out and adhered with foam tape.
To finish, I added some ribbon, a flower stopper and a stamped sentiment.
My term on the AiFactory DT has now come to an end and I want to say what a real pleasure it has been working with such lovely images and with such lovely creative ladies.
Don't forget to check out the other DT creations and the prize is your choice of the above images.
Finally, I'm entering this card in the challenge over at Dutch Dare Card Challenges with the theme of an Easel Card with a Repeat Something - my buttons and the patchwork squares.

Thursday, 22 April 2010

AiFactory Challenge 33 - Anything But A Card

Hope everyone is well. It's time for the next challenge over at AiFactory and the theme for this week is Anything But A Card.
The Design Team were given some of the lovely clip art to work with and I've been lucky enough to get to use the All the Yum Stuff set which is a brightly coloured set of cupcake circles which really are yummy looking.
As it's food related, I decided to make a shopping list hanger for the kitchen so my list is always to hand and will hopefully encourage my family to add things that we're running out of (notice I said hopefully lol!!!)
This is really quite simple to make as all I did was cut an A4 size piece of mount board and cover it with orange gingham paper. I then punched out the cupcake circles and put them on black paper mats made using a small scalloped circle Nestabilities set. I stuck these down each side of the board.
I made a slot with a piece of green gingham paper and slid the back of a pre-made shopping list pad in the slot. It was quite a tight fit and prevents the pad moving about. I added a black gingham ribbon hanger at the back.

Thursday, 15 April 2010

AiFactory Challenge 32 - Birthdays

Hello everyone! Hope you're having a better week than me. I took my daughter to the physiotherapist yesterday for her ongoing back problem and was horrified to be told when she came out that she has a partially slipped disc at the base of her back!!! Not good when you're only 19. Thankfully it can be sorted out with exercise and what she's done so far has helped a lot, although it will take another 6 weeks to completely right itself.
Anyway, enough of our troubles and on to this weeks' challenge at Aifactory which has the theme of Birthdays-an easy one as I'm sure everyone has loads of these to do. The design team were asked to use one of two sets of gorgeous images and I was assigned this one:
And here's what I made:
I decided that a circular shape showed off the jolly sun image at it's best and worked out how to make a circular easel card with the help of Debbie Dolphin's article in the latest Craft Stamper magazine. She actually made a card with a label shape Nestabilities set but I used the same principle with my trusty Creative Memories circle cutting set.
I printed out the sun twice and coloured them with Distress inks in Mustard Seed, Dried Marigold and Spiced Marmalade. The paper I used is by Die Cuts With A View (DCWV) and is the Blossoms and Butterflies paper stack. I used a combination of Nestabilities and my circle cutter to cut the mat shapes. The last brown layer was cut with small scallop scissors as I didn't have anything else large enough.
I added a flower shaped brad and a computer generated sentiment to finish.
I hope you decide to join in with this one and also look at the other DT creations as the other set used is the gorgeous Ella the Mermaid set and the prize is either this one or the Happy Nature set I used.
Good luck, Fliss x

Thursday, 8 April 2010

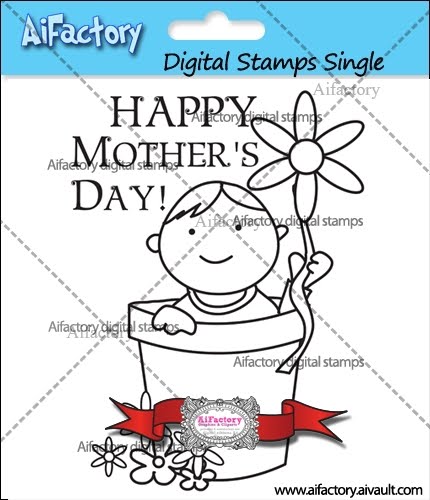
AiFactory Challenge 31 - Mothers Day

Hello everyone, I'm back with the next challenge over at AiFactory after a very difficult couple of days. I somehow managed to scratch my left eye on Monday and didn't realise until the evening when I went to take out my contact lenses (I'm blind as a bat without lol) and found that half my left eye was bright red. The next morning you could see the scratch so I haven't been able to wear a contact lens in that eye and as you can imagine, it's made everything really difficult!!!
The challenge we have this week is to make a project with Mum in mind and the DT were given some really lovely images to work with:


 This is the one I was asked to make my project with and I also managed to sneak the one below in as well.
Here's the card I made with the images:
I made my own background paper for this using white opaque Stazon ink for the resist technique. The clear stamp set I used is Papermania PMA9071004 Floral. I stamped a solid flower at random with the white ink and let it dry. I sponged Dried Marigold and Spiced Marmalade Distress ink over the top and then stamped on an open flower with the darker orange ink.  I then stamped on another flower with Tea Dye Distress ink.
I printed out the Mothers Day image 4 times and coloured various elements to build up my decoupage image. I assembled the pieces with foam tape and double sided tape. I printed out the flower 4 times and coloured this in a similar way to build up my 3D flower.
I sponged blue ink around the edges of the main panel and stuck this on a mat of deeper turquoise. I assembled the card with a piece of doyley on one side and some buttons tied with thread.
I'm also entering my card in the following challenges:
One Stitch At A Time - Anything Goes
Cupcake Craft Challenge - Make Your Own Flower
The Pink Elephant Challenge - Nature
Pollycraft Challenges - Anything Goes
CRAFT Challenge - Buttons

Thanks for looking,
Fliss x

Thursday, 1 April 2010

AiFactory Challenge 30 - ANYTHING GOES!

Morning everyone, it's time for the next challenge at AiFactory and this week's theme is Anything Goes! So let's see all your creations as you can enter any kind of project you like.
Mia challenged the Design Team to make something with this beautiful set of Clip Art with a flourish theme.  The lucky winner will receive this as the prize.
I'm also pleased to say that we're back with the old challenge blog this week as a lot of people found the new one a bit confusing. So if you click on the link above, you'll be transported to a much more familiar place!
Here's what I made with some of the images. I used a sketch by Doodle Palace for the card.

I printed a flourish in the top right hand corner of some polka dot paper for the background.
I manipulated and resized the border image to make the border strips and the frame. I printed these out on white parchment paper and coloured them with VersaColor inks in lilac, mint and sky blue.
The lovely image I used is actually holding a heart but I got a bit creative and turned the heart into a box of chocs with a black Sharpie fine pen. I printed out another image and coloured her with Promarkers, cut her out and added just the chocolate box and arms cut out from the first image to give a 3D effect.
I put the image on a square mat embossed with the Cuttlebug Swiss Dots folder. I then cut some Easter egg shapes from some of my experimental paper scraps which I printed out when working out which papers to use for my card. I coloured these with inks and embossed them using Crystal embossing powder.
I assembled the card as shown, adding a computer generated sentiment cut to an oval shape and Prima pastel flowers with pearl centres.

I'm entering my card into the following challenges:
Digital Tuesday - Scrap It! using paper scraps for  embellishments (my Easter eggs)
Papertake Weekly - Open Theme
Crafty Cardmakers - Spring
Cupcake Craft Challenges - Spring or Easter and Chocolate (colour or edible)
The Pink Elephant - Pastel Colour Theme
DareU2DigiStamp - Easter
Paper Cutz - Easter but no bunnies or chicks
Stampin For The Weekend - Easter
For Fun Challenges - Anything Goes as long as it's family friendly
Crafty Creations - Anything Goes
Stampin' Royalty - Easter
Creative Craft Challenges -  Eggstatic Easter

I hope you'll all have a go at the AiFactory challenge this week as it's the easiest ever and you have until 11pm next Wednesday evening (7 April) to upload your creations.

Thursday, 25 March 2010

AiFactory Challenge 29-An Easel Card With Lace

Morning everyone, it's time for the next challenge over at AiFactory and this week we would like to see an easel shape card in any variation you like and to use some lace on your card.
The Design Team are all lucky enough to have been given one of Mia's absolutely gorgeous Ella images to play with and this time Ella looks really cute as a ballerina. There are 2 different poses and the lucky winner can choose one of these as the prize. Here's the one I was asked to use:
I really enjoyed creating with this particular image as it brought back memories of my younger daughter doing ballet. She danced from the age of 4 and did all the exams, shows and so on and only gave up last year as she couldn't fit it in with the long hours required by her Art Foundation course.
Here's what I made:
I was particularly pleased to be able to use one of my own papers on this card as it went perfectly with the lovely Papermania Rose Garden paper I decided to use as I wanted a pink and green colour scheme.
I made my easel card out of bright pink card and added a square of pink and green Rose Garden paper. I used some of this on the card base with some of the matching border strips and some pretty pink crochet lace. I used a mixture of pearl and gem brads to help the easel front stand up.
My own paper uses my Twist on Resist Technique (see side labels) and I used my favourite rose stamps (MCS216 Stenciled Flowers by Clearly Inspired) with white embossing powder, Worn Lipstick Distress ink and Palette Lavendar Sachet solvent ink (this is like Stazon).
I printed Ella out and coloured her with Promarkers then put her on a white circular mat, sponging green ink around the edges. I then added a scalloped pink circle made with a Nestabilities die and finally a green circle.
I finished off with some roses altered with watercolour pencils and glitter and a computer generated sentiment.
I hope you can join in with our challenge and do take a look at the other beautiful DT creations-there are links on my side bar.

Thursday, 18 March 2010

AiFactory Challenge 28-Making A Scene


Morning everyone, it's Thursday so it's time for another challenge over at AiFactory and the challenge this week has been set by Erin.
She would like you to make a scene as your project plus you mustn't use any ribbon (this one caused withdrawal symptoms in a DT member who's ribbon mad lol).
If you're uploading to any online galleries, then please use keyword AIF028. Please have your entries uploaded by midnight EST next Wednesday.
The prize will be the gorgeous little pirate and treasure chest set that Mia kindly gave all the Design Team to make their projects.
We have a guest designer this week, the lovely Julie Whitehead and she's made a fabulous card so do pop over and take a look.
I chose to make a 3D card with mine to fit the make a scene challenge.
I made a frame to fit the front of the card blank I made up and then used a circle cutter and a craft knife and ruler to cut out a cave shape.
I used marbled paper as a background on the card itself and used 2 different sizes of circle punch to make "rocks" out of grey marbled card. I stuck more of these to the frame and then stuck this to the card front with foam tape.
I coloured the pirate and treasure chest with Promarkers, cut them out and stuck the chest inside the cave and the little pirate (hope you like his freckles!) on the frame.
To finish off, I added branches made with my recently acquired Sizzlits Flowers, Branches and Leaves set (from my friend Chris and it came in very handy for this!) plus punched flowers and some jewels and pearls for treasure.
Hope you can take part and do pop over to see the DT creations which are fabulous-the links are on my sidebar.
Fliss x

Thursday, 11 March 2010

AiFactory Challenge 27-Clear and Simple

Calling all crafters, it's now time for the next challenge from AiFactory which this week has been set by Laurie of Clearly Delightful Designs. Laurie's challenge is to use something clear on your creation, such as clear embossing, acetate, Glossy Accents, cracked glass technique etc and/or clear embellishments and to keep the design simple with the focus on your main image.
Laurie very kindly gave the DT some gorgeous lilies to play with. There are 4 in the complete set which is on special offer of $5 at the moment and the lucky winner will receive this as their prize. I was asked to use the beautiful Calla lily, to my great delight as it grows in loads of gorgeous shades. The colouring on mine was inspired by 2 glowing colours called Pot of Gold and Sunrise and here is my card.
There are several photos here so that you can see firstly that I have used acetate on the card and secondly to show a little more detail.
I printed my lilies out on smooth white card and after trying out several colouring methods, settled on a favourite, my much used Ranger Distress inks (no surprise here!!!). I started colouring in the centre, gently sponging with Mustard Seed. The lighter lilies, I then sponged with Dried Marigold, finishing with Spiced Marmalade on the outer edges. The stronger colour lilies just have the Spiced Marmalade.
I then added details with paintbrushes. I used a fine brush with Fired Brick to get the fluffy look on the stamens. I used a wider brush with Worn Lipstick to colour the curled petal edges. The stalks were sponged with Peeled Paint.
I attached some Basic Grey Ambrosia paper inside a Craftwork Cards acetate card wrap to make the card blank. I stuck the darker lilies on the backing paper and the lighter lilies on the acetate card front.
I finished it off with a label greeting from the Basic Grey paper pad with a Hero Arts sentiment stamped in the centre.
The other lilies in the set are Lilies of the Valley, Easter Lilies and Mariposa Lilies and you will find examples of these by hopping over to visit the other DT members. You will find all the links just opposite on my side bar. It's worth a peek for some truly awesome creations.
Thanks for looking and hope you can join in with the challenge.

Thursday, 4 March 2010

AiFactory Challenge 26 - Blue, Bling and a Bow

Morning everyone, it's time for this week's challenge over at AiFactory and the challenge is to include the colour blue on your creations along with some bling and a bow so it's the signal to hunt out those ribbons and some glittter, jewels etc etc.
The DT were all given a gorgeous image by Mia called Trinity which has 2 slightly different shape variations and I love it so much that I've got quite carried away and made 3 cards with it, all using different materials.
This first one is the most arty. I printed the image out on glossy photo paper and coloured her by sponging her with Ranger Distress inks. I mounted the panel on a piece of corrugated card painted with blue and bronze acrylic paints. I made a background using an AiFactory Hina Tattoo image printed out on white parchment card and sponged with Broken China Distress ink. I added a piece of copper metal foil embossed using the Cuttlebug Textile folder, sponged with blue, green and black StazOn inks. A chiffon and fibre bow and a faux coin border finished my creation.

This second one is much simple and more modern, I printed the image on white card and coloured her with Prismacolor pencils, sponging a little blue ink around the image. I cut her out with mini scallop scissors, mounted the panel on black card and trimmed her with the same scissors. I used background paper from the Daisy & Dandelion range, trimming one edge with the Martha Stewart Daisy Border punch. I added jewels to the flower centres and a black dotty bow to finish.

This last one doesn't have a bow as I thought it would be too much. I printed the image out on inkjet acetate and mounted her on a piece of inked glossy photo paper. I added a little extra colour to the reverse of the image with Promarkers before fixing to the inked paper with brads.
I made a background by spraying photo paper with Glimmer Mists in blue, pink and purple and edged the panel with blue glitter border peel offs. I added Dovecraft Retro Floral brads at the bottom and used the matching paper as a background.

Thursday, 25 February 2010

AiFactory Challenge 25-Recipe Cards

Morning folks! A little late with this due to a very busy evening yesterday. This week's challenge over at AiFactory is to create a recipe card with your favourite recipe on it. The Design Team were all given these fabulous recipe cards designed by Mia to play with.
I had to think about this quite a lot because my favourite, most used recipes are mostly in my head so I tend to just go and make them without thinking about the quantities too much. Here's what I came up with.

I made a pocket to contain my cards and sized it to be a liitle larger all round with the back longer so that I could add tabs to pull the cards out. I covered the front with Papermania Candyfloss and Marshmallow paper and used some of this to make tabs for the cards. I made the cards by printing out Mia's templates which come with matching fruity graphics and stuck mine to contrasting card after writing on the recipes. You can type your recipes into the pdf quite easily but I decided to go for the hand written look.
The other DT members have made some amazing things, not to mention shared some great recipes so if you look on the sidebar, you'll find a list of links to click on so you can see their creations.

Thursday, 18 February 2010

AiFactory Challenge 24 - 3D

Morning everyone, over at AiFactory Challenge this week the challenge is to make a three dimensional project and the DT were all challenged to make something with Mia' s downloadable vintage calendar - anything except a calendar!

This made everyone think outside the box and really brought out the creativity. Here's the wall hanging that I made with it using just some of the birds from the decorated top section.


I've inked my tags with Peeled Paint and Broken China Distress inks and then applied Vintage Photo using a kitchen scourer-yes, really! It gives a speckled effect rather like birds eggs which fit my theme perfectly.
I then applied torn papers and collage elements together with the cut out birds. I painted some Basic Grey chipboard letters with copper metallic acrylic paint and added these to finish the tags. I tied on some twisted paper string and attached the tags to a stick with this.

If you click on the names on the side bar under AiFactory DT you can see what the others have made and there's some fabulous creations there. It's incredible how many different things can be made from one item.

Check out the challenge too on the Challenge blog (link above and on sidebar).


Thursday, 11 February 2010

AiFactory Challenge 23-Hearts

This week's challenge over at AiFactory Challenge blog is all about hearts, as many as you can get on your card by way of backing papers, embellishments and so on. The design team have all been given one of the Softpencil images to work with-it's really sweet and is called A Lovely Couple. You can see more of the gorgeous images by popping over to the shop.
Here's what I made with the cute image.
I printed the cute couple twice and coloured just the hats on one couple and the remainder on the other using various colours of Promarkers. I stuck the hats on with foam pads for a raised look. I mounted the panel on red paper, trimmed on one side with a Martha Stewart dot scallop edge punch.
I made up the card using Basic Grey Ambrosia papers arranged in a patchwork square pattern. I layered a piece of the plain paper from the pack across the centre, embossed using the Cuttlebug Kimmy Luvs hearts folder. I finished off with a punched, embossed heart with a glitter flower embellishment and a computer generated sentiment.
To see the gorgeous cards made by the rest of the Design Team with the same image, and get an idea just how diiferent it can look, see the side labels for a list of their blog links.
Thanks for looking.
Fliss xx

Wednesday, 10 February 2010

AiFactory Prize Blog Hop

This post will remain at the top until the hop is over so please scroll down for later posts.

Hello everyone and welcome to the AiFactory Blog Hop. Today's the day to meet all the Design Team Members and there is a prize on offer to some lucky person who joins in.
We will be randomly picking one comment from one of the DT members' blogs to win a fab prize of a $20 Gift Certificate to the AiFactory store. Make sure you leave a comment on all the blogs though as the chosen blog is a secret.
If you arrived here from Monica's blog then you're on the right track but if not then go to the AiFactory Challenge Blog and start at the beginning.
Each DT member has been given one of three gorgeous images to work with so that you can see the different ways of making a beautiful project.
I've been given the cute Love You Ella and here's what I made with her.
I printed Ella out and coloured her with Promarkers. I cut her out and put her on a heart shape that I cut from white card, embossed with the Cuttlebug Floral Fantasy folder and then inked a little with pink inks.
The pretty paper I've used is by My Mind's Eye and called Pretty Please (it actually came free with Cardmaking & Papercraft magazine and included 6 x 6 papers plus borders and tags). I trimmed the top and bottom of the border with small scallop scissors and the papers with large scallop scissors. I added fabric flowers and buttons to finish.

The next blog that you need to visit is Fink's and don't forget to leave a comment here for the chance to win the fab prize which will be drawn on Wednesday 10 February at about 11.30pm.
Good luck!

Saturday, 30 January 2010

New DT News!

Hope you're all having a good weekend. I have some news to share in that I've been asked to join the Design Team of AiFactory which is owned by Mia who has an online shop of gorgeous images and digital papers etc.
Some exciting things will be happening in about a week's time so keep an eye out for the next post.

Monday, 18 January 2010

Two Hearts

This is my entry for this week's challenge at AI Factory with a theme of a Valentine card with lace. I've used one of their lovely digital image sheets for my card (if you pop over you'll be able to see the link to the online shop where you can try out some of the gorgeous images free) and I've resized the images and printed them out on to some of the gorgeous patterned papers from the new Love & Cherish Polka Doodles CD (click here for the shop).
Firstly, apologies for the rather bad photo of the front of the card as the colours are like the inside which was scanned. I couldn't scan the front as the pearls looked terrible!
All I've done to make the gatefold card is to stick on the printed out heart panels and add crocheted lace top and bottom. I then stuck on pink and cream pearls to decorate the hearts. I lined the inside with more of the polka dot paper and added a deeper pink heart embossed with the Cuttlebug textile folder and the sentiment from the digital sheet printed on patterned paper,  cut out with an oval cutter and matted on black. The sentiment on the front is computer generated.