Sunday 28 June 2009

Quilling-My First Attempt


I made these atcs for Larrie on Trimcraft's Technique Swap and the one for this month is quilling. As I've never done it before, I was rather nervous and got off to a bit of a shaky start. I wasn't happy with the background of the first one so set it aside while I made the second one which was the blue floral spray. After this I felt a lot more confident so redid my pink flower and then made the dragonfly followed by the butterfly. The backgrounds of these atcs are all recyled, 2 using the backing paper from the qulling papers and the other 2 were cut from an old copy of French Vogue and coloured with Distress inks in Shabby Shutters and Spiced Marmalade.
Although the technique is fiddly, I really enjoyed doing it once I got going and will be doing more in the future as I like making my own embellishments and the quilled flowers could add just the right finishing touch to my stamped creations.
Friday 26 June 2009

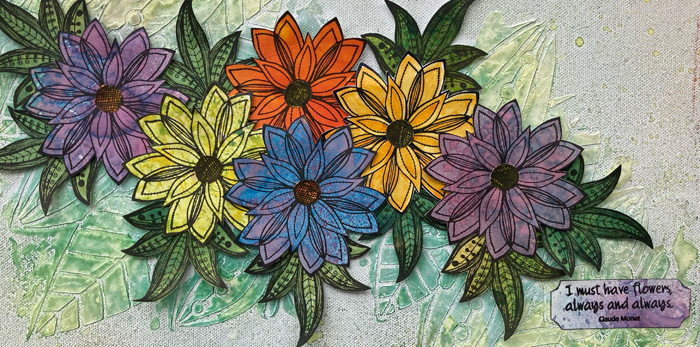
27th Anniversary


Today my hubby Andrew and I have been married for 27 years. It doesn't seem like it though as the time has simply flown by since we had our 2 daughters. Claire is now 20 and Sarah is 18 and sometimes it seems like it's only yesterday that they were little.
I made this card for Andrew to celebrate. It's not too fussy as he's not keen on anything too frilly.

The heart was cut out from some paper I decorated. I scribbled on watercolour paper in several colours of leafing pen (copper, gold and red shimmer). I then painted the paper with watercolour paints in deep red and pink. When it was dry, I rubbed a baby wipe over the top to remove the paint from the gilded areas. I then stamped on a design made from 9 squares chosen from a set of Magenta cling stamps in black Memories dye ink. Please note that you cannot use solvent ink such as StazOn for this as it takes off the gold leafing.

I then stamped the same 9 square design on white card in the black ink. I used a 12cm square and trimmed the edges with deckle scissors. I stamped a border of squares round the edges of a deep red 15cm square card.

To finish, I edged the heart with the gold leafing pen and added a greeting and a brass stamping in antique copper which I glued in place with Diamond Glaze.

Sunday 21 June 2009

Recycling Extravaganza 4


Here's my most unusual item. It's intended as a present combined with a card for any girl, young or a little more mature, that loves a bit of bling.
The circular centre piece on the card is detachable and can be hung up in the recipient's bedroom.
It is made from the top of a yogurt pot and a silk flower from an old arrangement was glued in the centre. When this is dry, all you do is add a puddle of Diamond Glaze (Judikins) all round and then stick in an assortment of buttons, beads, sequins etc. You then sprinkle tiny holeless beads (Accent beads) and glitter all over, pressing slightly into the glue. Leave overnight to dry and then tap off the excess glitter.
I then coloured it all over with purple alcohol ink and pierced a hole at the base to thread an old dangly earring through.
I pierced a hole at the top and tied the finished piece to a looped brad pushed through a large card embossed using a Cuttlebug. You need to use strong card or make a double card for this to support the weight.
You can also do this technique with a Pringle lid but it will need to be scaled down a bit.

Recycling Extravaganza 3


Here's a card I made using a tag made from a piece of plastic packaging which origanally contained jewellery from M & S. It's a lovely colour and a great shape when cut down a little so it's much too good to waste.
I cut it into a tag shape and stamped a flourish design all over in purple StazOn ink. I added a stamped image on glossy card, coloured with Distress inks and tied some ribbons cut from t shirts (used to keep them on the hangers in the shop) through the holes at the top.
The background card was cardboard from a cereal box which I painted with acrylic paints and then stamped and embossed. The card base is stamped around the edges with my favourite little Anna Griffin stamp. I added jewels to finish.

Recycling Extravaganza 2


Here's my next offering which involves the use of a really pretty paper bag which I was given when I bought something from a craft shop a while back. I quite often find that craft shops use lovely bags and it seems only right to use them for something crafty.
I used my favourite flourish stamp by Tim Holtz to add a little extra pizazz and made a card and an atc with the front of the bag.
The card also uses a piece of painted corrugated card packaging and a label from a sweater I bought at my favourite designer discount store.
The atc has an old earring swinging at the base of the stamped image.

Recycling Extravaganza 1


Managed to get some new techniques finished at last. They all involve recycling which is really important to me. I think in these difficult times it's great to save some money and with a bit of ingenuity you can make some really lovely things using recycled stuff.
Here's my first contribution which uses the insides of envelopes which I always have a large variety of as the patterns inside are so pretty.
I have stamped on some of the envelopes to add interest and embossed others with Cuttlebug folders. I have also stamped images on some and cut them out. The cut out flowers have also been stamped with a script stamp before cutting them out.
The envelopes also work well with decoupage as shown by the lovely Hobby Art Butterfly Jewel stamp which looks great in shades of blue.

Sunday 7 June 2009

Purr-fect Birthday


I made this card for my niece Lucy's birthday tomorrow. The background paper is in my favourite blue and purple using the watercolour crayon technique from an earlier post.
I cut an oval shape out of the paper to be economical (if you cut where you're going to place your main image, you can use the cutout on your card or save for another).
I cut an oval purple card mat and a white one which I stamped the same open flower on in purple ink. I stuck all the ovals together and then added a cutout image-my favourite Hobby Art cat stamp-she's called Daisy and I think she looks like the cat who's got the cream.
I finished the card with a silk flower, some grosgrain ribbon and a computer generated sentiment.

Monday 1 June 2009

Precious Things


I decided to enter the current challenge with a book about the things that are important to me. It took a while as I made the whole project from scratch.
The pages are made from thick white card cut into arch shapes. I then stamped on each one using my Millefiore technique and a similar layered stamping technique.
I then added photos, stamped images, titles and sayings. I finished it off with embellishments and some computer generated text as I'm not that keen on hand writing it.