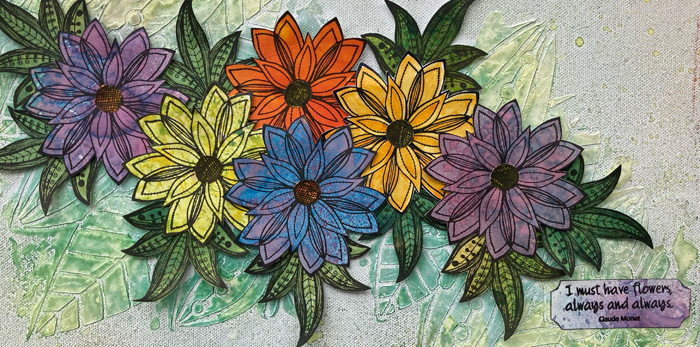
Hello there folks and thank you for visiting me today. My post is to tell you about my project today over at That's Crafty which is another creation from my play date a couple of weeks back with the Stampendous Creative Palette.
I also have some exciting news about our new challenge blog which you can find HERE. The first challenge starts next Friday 7th March and has the theme of Anything Goes. The prize up for grabs is a voucher for the shop worth £20. So, what are you waiting for - time to get creating!
Have a great day and a lovely weekend.
Hugs,
Fliss xx
Friday, 28 February 2014
Monday, 24 February 2014
No Cute Allowed!
Hello there, a slightly late post today to let you know about the new challenge that started today over at Make My Monday which has the theme of A Grown Up Card with absolutely no cute images allowed.
Here's my inspiration for the challenge and I hope you can join us this week as the theme is quite an easy one.
For my card I've used another of my recently acquired Aurora Wings images and this one is called Autumn Rose although as you'll see, she makes a lovely Springtime rose too.
I printed her out on to thick, smooth cartridge paper and used my favourite colouring medium of Aquamarkers to give her a wash of colour. I trimmed the image to a rectangular panel and added mats of mauve and green.
My background paper is from the vintage style Madame Payraud collection by Docrafts as I thought this particular design toned well with my coloured image. I embossed one side of the paper with my favourite Cuttlebug textile folder and trimmed it to fit my square card blank.
I stamped the Kaisercraft butterfly with VersaFine Smokey Gray ink on a scrap of leftover paper from my bits box which was a similar green to the matting. I cut the image out and inked the edges lilac to tone in.
I stamped my favourite birthday sentiment by Flonzcraft with the grey ink and then inked the panel with green and lilac to match. I finished off with some lilac gems in the corner and on the butterfly's body.
Hope you have a great week.
Hugs,
Fliss xx
Some challenges for my card:
2 Sisters - Embossing
Card Makin' Mamas - Stack It Up! - 3 or more layers (I have 5 I think!)
Labels:
Aurora Wings,
Feminine,
Flonzcraft,
Kaisercraft,
Make My Monday
Friday, 21 February 2014
La Vie Scientifique For That's Crafty
Good morning folks, I hope you've all had a better week than mine as my journey to work has been fraught with difficulties all week due to local flooding and burst water mains combined with roadworks! I really hope things improve soon as I'm getting very fed up with all of it!
Anyhow, enough of my troubles and on to my reason for today's post which is to tell you about the project I have over at That's Crafty which is a creation with another of the papers I made last week in my mono printing session with Stampendous Creative Palette and I've gone steampunk this week!
You'll find a pic of the whole creation over at the blog with all the materials details and how I made it and I'd love it if you came to visit.
Have a great day and a lovely weekend.
Hugs,
Fliss xx
Monday, 17 February 2014
Time For A Recipe
Hello there and hope you all had a lovely weekend. Rather mixed weather but I managed to fit in a bit of crafting, one of which is my inspiration for the new challenge today over at Make My Monday which has been chosen by Jacqueline and is a recipe:
5 Gems
4 Colours
3 Stamped Images
2 Layers
1 Word
My 4 colours are pink, lilac, green and brown. The 3 stamped images are the lovely Le Brun by B Line Designs (my favourite stamp) and the 2 flowers which are from the Crafty Individuals flower heads set.
I found the 2 layers a bit of a challenge as I usually have more than that and I managed to get a more layered look by using square panels of background paper in a patchwork design, adding faux stitching made with the Tim Holtz ruler and a fine brown Copic Multiliner pen. I stamped my 1 word using a stamp from a Prima set on the bottom right corner panel after adding my squares to a kraft card blank.
I stamped Le Brun with Archival Coffee ink on smooth cartridge paper and coloured her with Prisma pencils. I cut out round part of the image and added her in the centre right side.
I stamped a couple of flowers with the coffee ink, coloured them with pencils and cut them out then added them to the card with some Elizabeth Craft leaf sprigs die cut from kraft card.
I finished off with a resin heart and 5 lilac gems.
I hope you can join us and do pop over to see the Design Team inspiration as I promise it's not as hard as you might think!
Have a great day.
Fliss xx
Friday, 14 February 2014
Serene In Green For That's Crafty
Hello there and welcome to today's post which is to tell you about my project for today over at That's Crafty which is my first creation with the new and fabulous Stampendous Creative Palette which is a monoprinting plate and allows you to make quite a few prints in one session.
You'll find all the details over at the blog along with a pic of all the prints I made along with the one used on my card above.
Hope you can pop over and in the meantime have a great day.
Hugs, Fliss xx
You'll find all the details over at the blog along with a pic of all the prints I made along with the one used on my card above.
Hope you can pop over and in the meantime have a great day.
Hugs, Fliss xx
Labels:
Kaisercraft,
Stampendous,
That's Crafty
Monday, 10 February 2014
Love Is In The Air
Morning folks and hope you had a good weekend. I thought I was going to get blown away in mine as the winds were so strong it was hard to walk! I hope anyone else affected managed to survive OK.
It's time for a new challenge at Make My Monday and this week with a certain romantic day fast approaching Love Is In The Air.
As I was short of time, I had a rummage in my bits box and found something I'd started a while back but not finished. So I got cracking and finished it off. Hope you like it!
I made the card blank with the Tim Holtz cabinet card die with a piece of smooth, thick white card. I then stamped on a Hobby Craft background stamp using embossing ink and heat embossed it with clear powder.
I then inked the card with Shabby Shutters and Crushed Olive Distress inks to give the resist effect you can see.
I stamped the lovely vintage couple (Flonzcraft) with Memories Artprint Brown on white card, coloured with Promarkers and cut them out to fit on a circle of lilac card dry embossed with a Cuttlebug hearts folder.
I added crochet lace altered with Distress Stains and trimmed the image panel to fit on the side of the card. I finished off with a layered flower and some inked computer generated text .
Have a great day.
Hugs,
Fliss xx
Some challenges for my card:
Addicted To Stamps - Hearts
A Gem Of A Challenge - All You Need Is Love
Open Minded Challenges - Show Some Love
Labels:
Flonzcraft,
Make My Monday
Friday, 7 February 2014
A Feathered Friend For That's Crafty
Hello there, I hope you're all managing to survive the current never ending wind and rain and my thoughts are with anyone affected by the flooding. We've had very soggy and waterlogged roads here and tons of nasty potholes everywhere but thankfully no local floods. I also now have to keep a towel in the car to stop soaking the seats having to walk to the car park in the deluge!
Enough moaning though and on to today's post which is to tell you about the project I have today over at That's Crafty which is quite a striking nature themed card created with my favourite set of bird stamps.
As usual you'll find the materials and a tutorial over at the blog and I hope you can pop on over to see how the card came about.
Have a great weekend and try to stay warm and dry - I think even the ducks would not like the current downpour!
Hugs,
Fliss xx
Labels:
Artemio,
Nature,
That's Crafty
Monday, 3 February 2014
Floral Wall Art
Good morning folks and welcome to my first post of the month and I have to say I'm so very glad it's February as last month was so busy I had virtually no spare time and I've really missed being able to create and come visiting you all.
Over at Make My Monday we have a new challenge for you today and it's my turn to pick the theme. As I like creating something other than cards when I can, I picked Anything But A Card.
As you'll probably see, I've been playing with my much loved Inkadinkado stamping gear again to make my wall hanging.
I absolutely love the flower petals stamp set which I used to make this. The petals reminded me a little of crocuses so I had them in mind with my colour scheme. I stamped the petals using the round cog and Memento Sweet Plum ink. I stamped 2 complete circles for layering as I like the more realistic effect it gives. I used thick smooth cartridge paper for the stamping as it's fab for colouring with Aquamarkers.
I painted the petals with Straw Yellow near the base with a touch of Bamboo. I then added Vintage Pink in the centre following up with Plum Blush and the Royal Purple at the very edges of the petals. I then cut both floral circles out and layered them up with a die cut circle of pale yellow card embossed with the Cuttlebug Victoria folder. The base I used is a kraft chipboard circle with 2 holes at the top and I knotted yellow wired ribbon through to make the hanging element.
Have a great day and a lovely week and I'll be round to visit very soon.
Fliss x
Labels:
Aquamarkers,
Inkadinkado,
Make My Monday,
stamping gear,
Wall Art
Subscribe to:
Comments (Atom)


.JPG)


