Hello everyone, just to let you know that I have my usual post over at That's Crafty! Blog today which is another mixed media piece as I'm rather hooked on those at the moment.
Here's a sneak peek and you'll have to hop on over to the blog to see the whole thing and hope you will of course!
Have a great day and a lovely weekend.
Fliss xx
Friday, 28 July 2017
Friday, 21 July 2017
Hello for That's Crafty!
Guess who completely forgot to schedule her post for today's make over at That's Crafty! Blog! Oops!
I have a very simple CAS make this week as I was very short on time so hope you like what I made with a beautiful stamp that has been sitting in my stash uninked until now.
Here's just a little peek and you'll need to hop over to the blog to see the whole thing.
Hope you all have a lovely weekend and will be round to visit soon.
Fliss xx
All Things Grunge at That's Crafty! Challenge Blog
Hello everyone, I hope you've all had a good week. I've been spending some of my spare time getting to grips with Instagram with a bit of help from my Sarah who was home last weekend and explained how to do it all as I'm rather a technical dunce! It did mean my blog has been a bit neglected so hope to be visiting again over the weekend.
We have a great new challenge today over at That's Crafty! Challenge Blog and we're getting all grunged up as for the next fortnight, the theme is All Things Grunge.
My inspiration is an art panel made with one of the fab That's Crafty! Surfaces MDF panels as you can throw anything mixed media at it which isjust what I wanted to do.
So the first thing I did was to spread a thin layer of texture paste roughly on the panel. When it was dry, I added torn pieces of vintage book page and rose patterned tissue paper in several places gluing on with matt medium.
I then added a wash of pink and orange acrylic paint over the top, mixing in plenty of water so that you could still see the papers underneath. When happy with that, I used a harlequin and flower stencil with pink and green paint to add a bit of detail.
I sprinkled on Paper Artsy Infusions in purple and green, misting these with water and allowing them to run down the panel. The effect is quite subtle but you can see it if you look closely.
I took a piece of mixed media paper and die cut the chevron element which I coloured with Distress Oxides in pink, orange and green. I glued this on the panel on the top left side.
I stamped on some script rather randomly with fern green ink.
I next coloured the wild flower greyboard embellishments with shimmer paint, starting with green and adding antique gold over the top to create a lovely shimmery olive green.
The greyboard butterfly is, I think, my piece de resistance as I really enjoyed grunging this up! I started off by coating it with texture sand paste then gluing on a scrap of the flower pattern tissue paper. I then dabbed on yellow oxide ink and misted it with water to make the colour run. This gives a lovely aged effect. I used the flower stencil to add a pink floral pattern and glued on some tiny paper flowers for added interest.
I glued the embellishments to my panel, finishing off with some tiny butterfly buttons and the stamped text which I cut up and dipped in diluted oxide ink to tone the text to fit the panel. The final touch was to rub some antique gold paint around the edges.
Materials:
That's Crafty! Surfaces - MDF Panel 4.5x9
That's Crafty! Bits and Pieces Greyboard Embellishments - Small Wildflowers, Large Butterflies & Dragonflies
That's Crafty! Clear Stamp Sets - Textures Collection Set 1, Lynne's Affirmations Set 2
That's Crafty! Dinky Stencils - Distressed Harlequin, Floral Background
That's Crafty! Shimmer Paint - Green
That's Crafty! Metallic Paint - Antique Gold
Tim Holtz Frameworks Border Die - Chevron
Mixed Media Paper
Extras - Vintage Book Paper, Rose Patterned Tissue Paper, Butterfly Shaped Buttons, Tiny Paper Flowers
I hope you can enter as the prize is a voucher for the online shop where you'll be totally spoilt for choice!
Have a great day and a lovely weekend.
Fliss xx
We have a great new challenge today over at That's Crafty! Challenge Blog and we're getting all grunged up as for the next fortnight, the theme is All Things Grunge.
My inspiration is an art panel made with one of the fab That's Crafty! Surfaces MDF panels as you can throw anything mixed media at it which isjust what I wanted to do.
Here's the finished panel and I don't actually have the steps photographed as it was rather a go with the flow creation but you'll see below all the materials and I'll explain all the layers beneath it.
So the first thing I did was to spread a thin layer of texture paste roughly on the panel. When it was dry, I added torn pieces of vintage book page and rose patterned tissue paper in several places gluing on with matt medium.
I then added a wash of pink and orange acrylic paint over the top, mixing in plenty of water so that you could still see the papers underneath. When happy with that, I used a harlequin and flower stencil with pink and green paint to add a bit of detail.
I sprinkled on Paper Artsy Infusions in purple and green, misting these with water and allowing them to run down the panel. The effect is quite subtle but you can see it if you look closely.
I took a piece of mixed media paper and die cut the chevron element which I coloured with Distress Oxides in pink, orange and green. I glued this on the panel on the top left side.
I stamped on some script rather randomly with fern green ink.
I next coloured the wild flower greyboard embellishments with shimmer paint, starting with green and adding antique gold over the top to create a lovely shimmery olive green.
The greyboard butterfly is, I think, my piece de resistance as I really enjoyed grunging this up! I started off by coating it with texture sand paste then gluing on a scrap of the flower pattern tissue paper. I then dabbed on yellow oxide ink and misted it with water to make the colour run. This gives a lovely aged effect. I used the flower stencil to add a pink floral pattern and glued on some tiny paper flowers for added interest.
I glued the embellishments to my panel, finishing off with some tiny butterfly buttons and the stamped text which I cut up and dipped in diluted oxide ink to tone the text to fit the panel. The final touch was to rub some antique gold paint around the edges.
Materials:
That's Crafty! Surfaces - MDF Panel 4.5x9
That's Crafty! Bits and Pieces Greyboard Embellishments - Small Wildflowers, Large Butterflies & Dragonflies
That's Crafty! Clear Stamp Sets - Textures Collection Set 1, Lynne's Affirmations Set 2
That's Crafty! Dinky Stencils - Distressed Harlequin, Floral Background
That's Crafty! Shimmer Paint - Green
That's Crafty! Metallic Paint - Antique Gold
Tim Holtz Frameworks Border Die - Chevron
Mixed Media Paper
Extras - Vintage Book Paper, Rose Patterned Tissue Paper, Butterfly Shaped Buttons, Tiny Paper Flowers
I hope you can enter as the prize is a voucher for the online shop where you'll be totally spoilt for choice!
Have a great day and a lovely weekend.
Fliss xx
Friday, 14 July 2017
Funky Flower Jug for That's Crafty!
Hello everyone, I'm so sorry to have been a bad visitor the last couple of weeks, I've been so busy with work that I've not had a free day since the Monday before last! Hopefully things have now slowed down a bit and I'll have some "me" time.
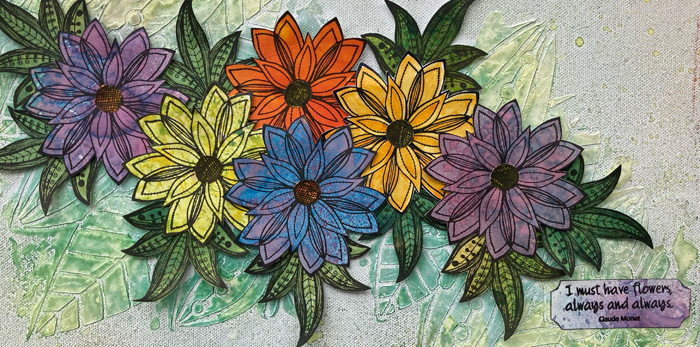
I have my usual Friday post over at That's Crafty! Blog and this week it's another very bright creation (that I only just got finished in time too!) featuring one of the new and fabulous giganTAGs and some of the greyboard embellishments.
Hope you like the peek and you'll find all the details over at the blog if you'd like to hop over. Hope you do!
Have a great day and a lovely weekend and see you soon.
Fliss xx
Friday, 7 July 2017
Meadow Bright at That's Crafty! Blog
Hello again, a slightly late post to let you know I have a new creation today over at That's Crafty! Blog and late as I've been to the optometrist to collect my long awaited glasses which I hope will sort out the closer vision issues that I've had since my second cataract op in May.
Vision is currently a little weird as they said it will take a little while to get used to them but I can read very tiny fonts so hopefully all will be well.
Here's a sneak peek of my mixed media project and hope you like it as in contrast to my last one, it's very bright!
Hope you have a lovely rest of the day and a great weekend.
Fliss xx
Anything Goes! at That's Crafty! Challenge Blog
Hello and welcome to my inspiration for our new challenge today over at That's Crafty! Challenge Blog where our new theme is a really easy one as Anything Goes!
You should try and enter as the prize is a voucher for the online shop and there are so many amazing goodies you'll be spoilt for choice.
My inspiration is a mixed media tag using one of the fabulous MDF surfaces which will take any medium you throw at them without fear of buckling.
You should try and enter as the prize is a voucher for the online shop and there are so many amazing goodies you'll be spoilt for choice.
My inspiration is a mixed media tag using one of the fabulous MDF surfaces which will take any medium you throw at them without fear of buckling.
I decided on my much loved tree bark effect background as I get withdrawal symptoms if I don't do this every so often!
The first thing you do is spread a thick layer of texture paste on the tag surface then draw on a pattern to resemble tree bark with a wooden skewer. It's one of those things you don't see the full effect of until you add the paint so don't worry if you think it doesn't look like much at this stage.
Then when you add a couple of layers of paint - I use a couple of shades of brown, a grey and finally add a few green streaks to look like moss or lichen and this is what it looks like then.
Now do you see what I mean!
I then stamped some of the gorgeous camellias from the Rubber Dance Antique Botanicals set on manila cardstock with Archival Potting Soil ink - I stamped 6 for some layering up. I cut out 3 whole flowers and then just the flower from the remainder, shaping the images with a large embossing tool and layering the separate flowers on top with 3D tape for added dimension.
I painted some of the leaf sprigs from the brand new Bits and Pieces greyboard embellishments by That's Crafty! (from the Small Funky Flowers Set 1) using cream paint and die cut some leafy sprigs (Tim Holtz Garden Greens) from manila cardstock.
I then assembled the panel as you see, finishing off with some toning sari ribbon and a stamped butterfly (Carabelle Studio) from my bits box.
Have a great day and will see you later with details of my Friday post at That's Crafty! Blog which is the complete opposite to this being very bright!
Fliss xx
Subscribe to:
Comments (Atom)


.JPG)


