Saturday, 31 October 2009

Spooky Halloween Birthday

Firstly I'd like to say a big welcome to Julie who has just become a follower. Do check out her blog for some fab work and a gorgeous recipe for Apple Puff Pancake which sounds just heavenly.

It's my nephew Sam's 15th birthday today (where does the time go!!!) and I decided this year I would actually make him a spooky card for probably the first and last time. He's football mad so you can guess what I normally do.
Here's his card


The background paper is made from a piece of patterned paper that I altered with Spiced Marmalade Distress ink and then stamped on the brick pattern from my grunge backgrounds set by I Brake For Stamps from the Craft Fairy.
All of the images I used came from the Dezinaworld Halloween Collage Sheets and were cut out and collaged to the background with double sided tape and foam tape.
Many thanks to Cheryl on the Dezinaworld DT for the inspiration to get me started on this one as I'm more used to stamping than using lots of images but don't own any spooky stamps.

Pretty In Pink (And Brown)

This is my card for Challenge 8 over at Sophisticat Challenges and the theme of pink and brown plus flowers was set by new DT member Avril Ann.

All the stamps used here are by Hobby Art.
The pink background paper was created by stamped a flourish all over pink card in coffee ink and then embossing it with the Cuttlebug Victoria folder. I then inked it with slightly deeper pink ink to make the embossing pop out. I trimmed the top edge with scallop scissors.
I stamped the floral image on pink card and coloured it with Prisma pencils. I trimmed it to a square, rounded the corners and mounted it on several layers of card in coffee, deeper pink and cream.
I embossed a piece of coffee card with the same Cuttlebug folder and trimmed the lower edge with scallop scissors.
The card is finished with lots of little details-a stamped butterfly, glitter ribbon, pearls and a greeting.

Spread Your Wings and Fly

This is my entry for Play Date Cafe Challenge 2 which has been set by Sarah. The colours to use are orange and yellow inspired by autumn leaves. I love those colours at the moment as I'm an Autumn girl at heart.
Here's my card


The background paper for the card was made using my watercolour crayon technique and Neocolor 11 crayons in shades of orange and yellow. I stamped a flower on the paper with Dried Marigold Distress ink. I stamped a border design across the bottom in sepia ink and trimmed the edge with deckle scissors.
The frilly flower is made using the same technique on punched circles of card which were then trimmed with deckle scissors and inked.  I then made several cuts in each and scrunched it a little to make it crinkle.  I stuck them together with a button in the centre.
I stamped the main image by Lost Coast Designs in sepia ink and coloured some parts in with crayons. I added further detail with H20 paints.
I mounted the background paper on a square of card stamped around the edges only with a small flourish stamp in Dried Marigold and Fired Brick Distress inks.
I assembled the card as shown adding further text and some tiny butterflies (Hobby Art) on a dark brown card blank.

Thursday, 29 October 2009

Rainbow Doodling

Here are a bunch of cards I made with my Oodles of Doodles stamps but on a slightly different theme as I've used rainbow ink pads in various ways to make them.


This one has a background embossed with the Cuttlebug Birds and Swirls folder which I then inked using colours from the Memories Festive Moments Chalk Rainbow ink pad. The flower was stamped on pink card in Belle Rose Palette ink and the leaf/stalk in Landscape Palette ink. The stalk is made from the centre section of the corner stamp from Oodles of Doodles 3and has been trimmed to make the shape (a bit of thinking outside the box!).  I added a shell button to the flower centre.


This card has a background of glossy card brayered with the same rainbow pad and then stamped with the single flower from Set 1 in the same ink. The tag was stamped with the same flower in VersaMark ink and coloured with pastel chalks. The large flower was stamped twice in the rainbow ink and just the centre cut out of the second one. These were layered together on the tag with a jewel centre.  I trimmed the edge of the card with scallop scissors and added a contrast strip of card on the inside.


This one uses the same ink pad to stamp the butterfly on pink card, cut it out and emboss on the reverse with a ball tool to round it. The background card is stamped with the circle from Set 1 in Memories Quiet Yellow Chalk ink on aqua card. The other background panel is embossed with the Cuttlebug Floral Screen folder on yellow card. Ribbon was added across the join before sticking the butterfly on with foam tape.

This last for the moment has a background paper made by sponging the rainbow ink through sequin waste on to white card. The other 2 sections are embossed with the Cuttlebug Swirls folder. The heart was stamped in violet ink on card previously brayered with rainbow ink and cut out. A piece of toning braid was added before sticking the heart on and a setiment was added (part of Hobby Art's With Love stamp).

News and a 21st Card

I had some really great news this morning from Alison at Play Date Cafe to say that my Italia altered art piece has gained a Fab 4 honour in the first challenge. I'm thrilled to bits with this and it really has made my day.
This is to add to the great news from yesterday that I could take an honour from Sophisticat Challenge Blog as making the Top 3. Thanks Lisa!
2 in one week-how great is that!
It's also my niece Hannah's 21st Birthday today-she's my sister's youngest. This is the card I've made for her and I hope she likes it.


My stamped background papers were made using my favourite Hobby Art flourish stamp and I've stamped the same flourish in pink on my white paper flower.
The other flower was painted pink (it started off white) and glittered when dry. I added ribbon and a stamped sentiment and numbers on contrasting card (both Hero Arts). I brushed acrylic paint on a textured button for the flower centre.
I've also decided to enter this one in the latest Incy Wincy Designs challenge as it's to use your favourite embellishments. Mine have to be paper flowers and buttons, especially if they can be altered to match your project with ink, paint or stamping.

Wednesday, 28 October 2009

Sylvia's Cards With My Oodles of Doodles Stamps

Today I found a lovely message on my blog from Sylvia-Anne who won my stamps in my first Blog Candy offer, saying that she has made some cards with them which she is donating to charity.
Sylvia's blog is called Poppy's Papercraft Patch and if you click here you can see her lovely creations. As you will see, her interpretation of the stamp designs is quite different to mine.
Thank you Sylvia for posting these for everyone to see.

Queen (Dezinaworld Lace Challenge)

Well, finally got round to doing my bit for this month's challenge at Dezinaworld after a timely reminder from June (thanks!). The theme is lace and my entry is a tag as I really like doing these at the moment. They don't take too long and can always be used on a card as a topper.
Here's my tag


I've made the tag in a favourite arch shape which is a template from Hero Arts from a while back. I stamped a large background on most of it in Vintage Sepia VersaFine ink and stamped a border from Technique Tuesday Bijou Borders in the remaining space.
The gorgeous image I've used is from Dezinaworld's Shy Girls collage sheet and I chose her because of the lace collar. I rounded the corners, inked the edges with brown ink and added to the tag with foam tape.
To finish the tag, I added an antique gold brass stamping from Empire Beads at the top, stamped the sentiment by Anna Griffin in sepia ink and stuck this on my crochet lace trim. I added a Prima flower with a pearl centre and finally a crown. This is a favourite trick of mine as I don't have a crown stamp-I used 2 of the borders from the Technique Tuesday set, stamped one above the other, embossed with gold detail powder and trimmed to make the crown shape.

Monday, 26 October 2009

Priceless

This is my entry for this week's sketch challenge at Papertake Weekly


My 2 background panels of lilac and pink card were embossed with the Cuttlebug Floral Fantasy folder and trimmed with small scallop scissors. I stuck them to a square white textured card blank.
I added a semi circular panel of decorated paper made using my watercolour crayon technique (see side labels for link to see how to make this) and topped it with my most used image stamp in black-Audrey by B Line Designs.
I added a strip of mauve velvet ribbon, some paper flowers layered with an ornate brad by Making Memories and a stamped greeting by Hero Arts.

Memories of Italy

It's big thanks to the lovely Sarah at Play Date Cafe that I finished this piece of altered art this morning. She kindly left a lovely comment on my Snow Bird card and told me about the new challenge blog Play Date Cafe. When I saw the colours to use I just had to finish off this piece which I started a couple of weeks ago as I think it fits the bill perfectly.
This is the inspiration you need to use:
 
My piece of altered art started off as the divider in a box of mini bars of Green & Blacks chocs received  last Christmas and I saved it as I was intrigued by the shape so it ended up in my recycling box.
I decided to use it to make a small memento of my favourite place for holidays-Italy. I just love going there and 2 years ago when my hubby and I celebrated our Silver Anniversary, we went on a really gorgeous trip to Sorrento with our 2 girls and it was the best holiday ever. There are quite a few flourishes on my artwork because we went to Capri on our holiday and took the long route to the top of the island via a back route past the most beautiful gardens with gorgeous wrought iron gates and these flourishes are just like some of the designs.
You'll need to click on the photo to see it properly as I couldn't make it large enough here.


I painted the card with yellow ochre, raw sienna and terracotta acrylic paints and then stamped on some of the tiles from Magenta CSET28 in Vintage Sepia VersaFine ink.
I then made tiny collages for the 4 central panels using leftovers of my watercolour crayon technique papers and some images from a serviette which I scanned and shrunk on my computer. I then added charcoal grey diecuts from the Cuttlebug Floral Borders set. I added small pieces of text which I inked with Topaz Versacolor ink.
The end panels have more border die cuts in black with Prima flowers, brads and brass stampings from Empire Beads, together with tiny mosaic tiles. To finish, I stamped letters to spell Italia with a Hero Arts set in sepia ink and inked them to match.

Sunday, 25 October 2009

Snow Bird RSS Challenge 8

The ingredients for the latest challenge at Ready Steady Stamp are as follows:
  1. C for Christmas
  2. Lilac, Black & Silver
  3. Snowflakes
  4. A Skinny (2x4)
  5. Crackle

This is my take on the ingredients.
  1. My background paper is stamped with snowflakes which were embossed with silver. I then sponged on Pretty Petunia VersaMagic ink and stamped on further snowflakes with Lavender Sachet Palette ink.
  2. I stamped the bird image (Crafty Individuals CI-224) in black ink and added colour with pencils and sponged inks in lilac and lime. I then inked the panel with embossing ink and embossed with clear powder, repeating the step 3 times. I inked up with embossing ink again, added clear powder and heated it to melt it, then stamped a crackle pattern stamp into it whilst still hot. I trimmed the top and bottom edges with deckle scissors.
  3. I cut a strip of silver card and embossed it with the Cuttlebug Snowflakes folder. I stuck the snowflake paper to a square card blank and stuck the silver panel on the left side. I matted the bird panel on black card and stuck this near the top of the siver panel.
  4. To finish the card, I stamped the Christmas greeting by Stamp n' Stor on white card and trimmed it to a skinny strip. I trimmed the side edges with deckle scissors and stuck it to the right side of the card. I added a poinsettia embellishment with a brad centre.

Saturday, 24 October 2009

Partridge In A Pear Tree 12 Days of Christmas

The latest Sunday Challenge at UK Stampers is to make a little 10cm square booklet with a page per week covering the 12 Days of Christmas. It doesn't actually have to be Christmas as long as it takes inspiration from the song lyrics. Mine is on a Christmas theme as that is more of a challenge to me although I have a rather fat bird instead of an actual partridge lol.
I think this also covers the first challenge at Creative Craft Challenges with the theme of "the first" as it's the first day of Christmas so this will be my entry for that too.

To make the page I cut the 10cm square of strong white card and inked it with Scattered Straw Distress ink. I then stamped on Paper Artsy MN39 in Vintage Sepia ink on the left side and the tree from Papermania 001223 in the same ink at the bottom right.
I then sponged on more colour using Spiced Marmalade, Fired Brick, Peeled Paint and Broken China Distress inks. I stamped the bird (Inkadinkado Birds Galore 97625) in the Sepia ink and cut it out. I stamped the number from a Hero Arts set in the same ink and cut it out, inking with a little Scattered Straw.
The pears came from my bits box and I just sponged on a little more colour. I printed the text on the computer, cut the words out and inked them. I then assembled the page as shown, adding jewels to the tree.

Wednesday, 21 October 2009

Remembrance-Sophisticat Challenge 7

This is the first time I've entered the Sophisticat Challenge and decided to do it after seeing it on the lovely Cheryl's blog. The challenge is a lovely sketch by Lisa:


For my card I've used stamping, heat embossing, paint and some Cuttlebug embossing so it is quite a mixed media project.


  1. Cut a 5inch circle of pink card and stamp on Magenta H.0269 first in Spring Pansy and then in Pretty Petunia VersaMagic inks, layering the darker images on top of the lighter. Ink the edges with the darker ink.
  2. Cut a piece of corrugated cardboard to fit across the bottom of your chosen card blank. Paint with acrylic paint in shades of pink and lilac. When dry make 3 holes with a piercer and secure 3 decorative brads on the card. Mine are by Making Memories.
  3. Choose a vintage image in an oval shape (if you like mine check out my side labels and click on the one that says vintage image downloads as you can download it straight from my blog). Cut an oval shape of lilac card a little larger than the image and stamp all around the edges with a small decorative stamp and Encore Pink ink. Emboss with clear powder. My small stamp is by Anna Griffin.
  4. Emboss the top half of your card blank using the Cuttlebug Victoria folder. Stick the corrugated panel on the lower half. Stick the framed image to the stamped circle and secure to the card with thick foam tape.
  5. To finish add paper flowers with pearl and jewel centres, a small Laura Ashley bar sticker and a sentiment. I've used the one from my vintage download.

Tuesday, 20 October 2009

Bonjour! Delightful Sketches Challenge 9

Well it's now time for Sketch 9 challenge over at Delightful Sketches and this is my take on the sketch. It's a little different as you know I like doing arty style projects rather than cute. I've chosen another favourite Paper Artsy stamp Winter Wonderland Plate 6 and have combined it with a Parisien theme.

I inked some white card with Scattered Straw and Vintage Photo Distress inks, cut it in half and stamped each one with Hero Arts Old French Writing in the Vintage Photo ink. I then stamped B Line Designs Eiffel Tower on one with some Fleur de Lys from a clear set by All Night Media and the other with stamps from the same clear set.
I stamped the woman image on white card in Vintage Sepia VersaFine ink and coloured her by sponging with Distress inks in Peeled Paint, Broken China, Worn Lipstick, Scattered Straw and Vintage Photo. I used watercolour pencils to tint her face. I cut her into an oval shape and inked the edges with brown ink.
I stuck the French themed panels to a square caramel mottled card blank and added the oval image panel with foam tape. I finished the card with a Prima flower with a jewelled brad centre and a greeting stamped in brown ink and inked a little with toning colours. Finally, I added a Laura Ashley Traditional clear bar sticker, cut in half and stuck on each side panel.

Sunday, 18 October 2009

Spook Sisters Papertake Weekly Challenge

This week's challenge over at Papertake Weekly is "The Dark Side" so I decided to go really Gothic with mine and use a favourite Paper Artsy stamp which I own because my elder daughter is in a black phase at the moment.

I inked a piece of card with VersaMagic inks in Persimmon, Mango Madness and Red Magic and stamped the girl collage with black ink. I stamped the text from another Paper Artsy set round the edges, gradually fading the ink out. I added black letter stickers to spell spooky and inked the edges in black.
I stuck the image to a black panel, wider on the right hand side and embossed with the dots border from the Cuttlebug With Love borders set. I added tiny gunmetal pearls and a further inked and stamped text panel. I stuck this on to a grey newsprint card blank.

Rozzy's Trimcraft Quilling Sketch Challenge 2

Just made the deadline for this challenge due to laptop throwing a wobbly. As last time I really loved doing this and the sketch to follow is a daisy shape.
I made the daisy from full strips of 5mm quilling paper in yellow and orange in marquise shapes. Fot the leaves, I joined together half a pale green and a full mid green strip and wound them up with the pale colour in the centre. I made the finished wind slightly looser and pinched them into long marquise shapes.

The stem is made from a full green 3mm strip folded over several times and then glued together a bit. I find this makes it easier to glue the stem in place.
I cut a rectangle of white card, embossed it with the Cuttlebug Swiss Dots folder and trimmed the edges with scallop scissors. I then glued all the daisy pieces in place.
I used a piece of backing paper made with my Millefiori technique (see side labels) in toning colours and stuck this to a white square textured card blank with a narrow yellow strip embossed with the daisy spray from the Cuttlebug With Love border set.

Thursday, 15 October 2009

Chris (Craftling) Is Raising Money For Charity

I'm posting this to try and help my friend Chris in her quest to raise money for the Papworth Trust which is a charity helping people with disabilities. Chris is hoping to sell 10 copies of her wedding stationery CD and all the details can be found at the following link to her blog
http://craftlingscosycorner.blogspot.com/2009/09/different-kind-of-challenge.html
If you've got a spare minute do pop over and have a look as you might be able to help or know someone that can.
Thanks! Fliss xx

Sneak Peek of SSP Guild Project


I thought I'd show you a sneak peek of one of the projects I have in the latest issue of the Stamping, Scrapbooking and Papercraft Guild's online magazine. The guild, known as the SSP Guild is a private online forum which has lots of benefits if you join, including an exclusive stamp plate every 2 months plus lots of goodies when you join.

Why not pop over and see what it's all about and I promise you won't be disappointed.

Great News (for me!) And A Few Hellos

This morning I managed to oversleep as I forget to push the right button on my alarm so had a terrible rush but then discovered some really fab news which has made the day so much better.
I found a message on my blog from the lovely Wendy at Delightful Sketches to say that I'm the winner of this week's prize. I'm totally stunned as this is the first time I've entered this challenge-how amazing is that!!!
If you haven't entered yet, you really should give it a go as you never know, maybe it will be your lucky day next time.

I also want to say a very warm (and slightly belated in some cases) to some lovely crafters who have joined my blog. It's a big hello to Natalia, Lou, Nena, Melanie, Rosalee, Lucy, Heike and Chris (Chris has a special welcome as we lost each other for a while).

I also want to say a big hello to Jennie whom I know from the SSP Guild-if you haven't checked this out yet, click the link on my side bar and have a look and you won't be disappointed.

Last but not least, I want to say hello and welcome to Kerry who has a fab free image blog called the Graphic Addict (there's a link on the side bar) and also to Carol Anne who has a fab free vintage image blog called Carol Anne's Boutique (again there is a link on the side). It's well worth checking out these 2 blogs as both of these generous ladies have some incredible images on there perfect for all kinds of art work.

Fliss xx

Wednesday, 14 October 2009

Delightful Sketches Challenge 8


Decided to enter this at the last minute having seen it on someone's blog. It's Sketch Challenge 8 at Delightful Sketches.

Here's what I did to make the card which was actually easier than it might look considering I made my own background paper:
  1. I stamped Holly's Christmas by Stamp-It on white card, coloured it with pencils and cut into an oval shape. I then sponged with green and yellow inks for a soft look and matted it on a peach card oval.
  2. The background strip is parchment paper by Southfield Stationers, stamped with the Art Impressions Holly from Sir Stampalot in black and then sponged with Scattered Straw, Peeled Paint and Worn Lipstick Distress inks.
  3. I then cut 2 strips of Bazill Bling card and stuck these on a large pale green card blank with the background paper in the centre. I added strips of sparkly stick on ribbon.
  4. To finish the card, I added the image with foam tape together with a computer generated sentiment and 2 Prima flowers with jewelled centres.

Monday, 12 October 2009

Clowning Around Papertake Weekly Challenge

This week's challenge at Papertake Weekly is Sketch 25.

I decided to go for something slightly quirky as I bought a gorgeous set of stamps called Party Cats by Lost Coast Designs from Scrapz and wanted to use them.

Unusually for me, I used some Basic Grey Fusion papers (as you know I usually make my own background papers but these are SO gorgeous) for the card.
I followed the sketch and used 2 of the Fusion papers. I stamped the cat with the jester's hat on white card in VersaFine black ink 3 times, coloured the cat on one and the hat on another and cut them out for a decoupage effect. I added jewels to the hat.
I matted the cat image to  mauve card and assembled the card with deep green grosgrain and American Crafts striped ribbon. I added text generated on the computer. Sorry about the pun, but couldn't resist lol.
Fliss x

Sunday, 11 October 2009

Autumn Gold Ready Steady Stamp Challenge 7

Here's my entry for challenge 7 over at Ready Steady Stamp and the 5 ingredients to use are:
  1. Autumn
  2. Brown, Cream and Ochre
  3. Staples
  4. Distress inks in the background
  5. Hessian
  This is what I used to make the card:

  1. The background is Scattered Straw, Mustard Seed and Vintage Photo Distress ink on acrylic paper stamped with maple leaves in Vintage Photo.  The maple leaf stamp is by Personal Impressions.
  2. The tag is Acrylic Resist Technique (see side labels) using Yellow Ochre and Raw Sienna acrylic paints with the maple leaf stamp. A leaf stamped in Vintage Sepia VersaFine ink then clear embossed, coloured with Scattered Straw, Vintage Photo and Fired Brick Distress inks and cut out was added on one side.
  3. The leaf panel is made using the Encapsulated UTEE Technique (see side labels) with Scattered Straw on the background stamped with Hero Arts Long Writing in Vintage Photo. The leaf is stamped in Vintage Sepia VersaFine  ink and clear embossed. It was then coloured with Scattered Straw, Vintage Photo and Fired Brick Distress inks then cut out.
  4. The letters are Hero Arts LL829 Artistic Uppercase Alphabet stamped on twill tape with Vintage Sepia VersaFine ink and cut up.
  5. The acrylic resist tag is attached to a hessian frayed edge tag with a hessian loop and stapled together. A button was sewn on the top.
                                                                                                       

Friday, 9 October 2009

Our Two New Babies

I'm so excited as this morning we went to collect our new baby bunnies.
Some of you already know that we sadly lost our beautiful chocolate Dutch rabbit Poppy at the beginning of August due to a gastric problem and we were so upset that it was a while before we could think about getting any more.
The new bunnies are blue Netherland Dwarf rabbits and they're so cute and cuddly. They don't have names yet as we have to find 2 that we all agree on which is difficult!
I thought you might like to see them so here they are looking a bit startled and nervous but so cute.

Fliss xx

Wednesday, 7 October 2009

Free Vintage Images for My Lovely Followers

As promised yesterday, I have a couple of free vintage images for you to download as a little consolation for taking part in my blog candy draw to celebrate the launch of my Oodles of Doodles stamps. Unfortunately, there could only be one winner which was Sylvia-Anne so I thought everyone else who entered and all my other lovely followers ought to have a little something too.
I found these 2 lovely vintage images in a flea market last month and thought you might like to share them as the colours are so soft and pretty. To download them all you have to do is right click on the picture and save it to your computer.
Enjoy!

Fliss xx

Tuesday, 6 October 2009

Blog Candy Winner !!!

Hello everyone, hope you have better weather than it is here-the sunny south it is not! I do have some cheery news for one lucky person though as with my hubby's help (he's working at home today as we have a poorly boiler that needs fixing PDQ) I have done the promised draw. I wrote all names on squares of paper, folded them in 4 and put them in my hat, gave them a really good shaking up and hubby picked one out with his eyes shut.
And the winner is ............... SYLVIA-ANNE.
Many congratulations to you and if you email your address to me they'll be winging their way to you tomorrow.
Commiserations to everyone else although you can still get them from Hobby Art (or a Hobby Art stockist) or at the NEC in November.
I will be posting a little consolation prize on here tomorrow that you might like so keep an eye out for it.
Thank you all so much for joining in with me to celebrate the launch of my stamp designs. Your interest means a lot to me.
Fliss xxx

Monday, 5 October 2009

My First Blog Candy Now On Offer!!!


This post will now stay at the top until the draw takes place so that everyone can find it easily (and I can do more posts without worrying of course!)
To celebrate the launch of my new stamp designs for Hobby Art last Saturday, I'm offering blog candy for my lovely followers. The candy consists of a complete set of the 3 unmounted plates that I've designed.
All you have to do to be in with a chance of winning is to leave me a comment on this post and put the logo here on your blog to spread the word. Remember that you must be a follower to win the prize. The offer is open until Monday 5 October and I will be picking the winner at random the next day. Good luck everyone!
Fliss xx

My Blog Candy Offer Finishes At Midnight!

Hello everyone,
Just a quick reminder that my blog candy finishes at midnight tonight so if anyone hasn't yet added a comment you need to do it soon for a chance in winning my 3 sets of unmounted stamps. I'll also add an A4 piece of Kling-On mounting foam as a lot of you involved are international and might have trouble getting hold of it.
Many thanks to everyone who has joined in so far and all my new followers too. Good luck everyone.
I'll be making the draw some time tomorrow afternoon as I have to work in the morning so keep an eye out for the post with the lucky winner.
Fliss xx
PS: Please also remember that you must be a follower for your entry to count so if anyone hasn't yet done that now's the time.

Sunday, 4 October 2009

Best Friends Ready Steady Stamp Challenge

I found out about the Ready Steady Stamp Challenge via Sue Roddis's blog and felt I just had to enter as I bought some more of Tim Holtz's gorgeous masks at Ally Pally last weekend.
For the challenge, you have to use 5 ingredients:
The letter B
Colours pink, white and grey
Brackets
Masks in the background
Corrugated card
This helped take my mind off the unwanted thing brought back last weekend, a nasty cold, and stopped me feeling sorry for myself lol!
 
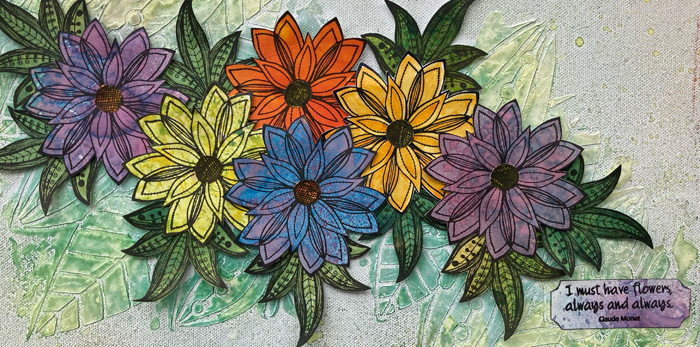
The background paper on the card is white card on which I arranged the masks from the Floret mini set. I then sponged pink acrylic ink over the masks which covered one side of the card, removed them and repeated this on the other half. When it was dry, I sponged on a little charcoal grey and metallic rose acrylic paint for an antiqued look. I trimmed the right hand edge with scallop scissors.
I painted a rectangle of corrugated card with deep pink acrylic paint and then dry brushed on white, charcoal grey and metallic pink paints.
I stamped the little girls image (CI-084 by Crafty Individuals) on pink marbled card with VersaFine Smokey Gray ink and trimmed close to the image. I cut a piece of white corded card larger than the image and embossed the left hand side with the largest border from the Cuttlebug Frills set. I then trimmed the left edge with scallop scissors. I stuck the image on as shown.
I improvised my bracket using part of the Ornamental Dies 37-1509 for the Cuttlebug and grey card. The saying is part of a stamp by Paperbag Studios PBS-009-E and is stamped in the grey VersaFine ink and just the phrases cut out.
I assembled the card as shown on a grey recycled newsprint square card I made and added a Dymo printed word under the image, one of my treasured Hero Arts fabric printed flowers (don't really want to use these-just want to keep them and look at them lol) and some flat backed grey pearls from Kanban.
Saturday, 3 October 2009

Rozzy's Trimcraft Quilling Sketch Challenge

Decided to enter this one having made quilled atcs a little while ago for Larrie's monthly Technique swap.

I made the quilled pieces using 5mm strips and the flower is actually bright pink but my scanner decided to make it light pink!
The background is a piece of cream card embossed using the Cuttlebug Stylised Flowers folder. I then inked the raised areas in orange and green pigment inks and the background in yellow.
I cut a narrow strip of deep green card and embossed it with the largest of the Cuttlebug Frills borders. I trimmed the bottom edge with scallop scissors.
I assembled all the pieces on a watermelon square card base.

Friday, 2 October 2009

Welcome to My New Followers This Week

A very warm welcome to all my newly joined followers at the end of the second week towards my blog candy draw which will end at midnight next Monday.
Hello to Jody and Lily from Canada, Nikki, Jenni, JulyeB, Sarah, Karenb and Sylvia from the UK,  Andreja from Slovenia, Doina from Romania, Anuta from Russia and Loz from Australia.
Wow ladies! My blog is now very international. If anyone would like me to put the Google translate on here to make it easier please do leave me a comment to let me know and I'll try and sort it out.
Thank you all very much for joining in and good luck!
Fliss xxx

Thursday, 1 October 2009

Feature the Background ATCs

These are the atcs I made for the September Technique Swap Feature the Background hosted by Larrie on Trimcraft. They all have simple images on them from Crafty Individuals and some magazine photos as I wanted the background to really stand out and not hide it with embellishments.

Rhapsody in Blue
This one has a background which has first been inked in shades of blue pigment ink. I then stamped on 2 tile type images from Stamp It in darker shades of blue. I then covered the stamped piece with embossing ink and embossed it with clear powder. I repeated this step twice more. The resulting background looks very like a glazed tile.

Music in Flight
The background of this atc is made using stripes of Marvy Metallic Marker pens in blue and green. When it was dry, I stamped on some dragonflies and embossed some in silver and some in metallic teal. I painted in details on the wings with glitter glue.

What A Girl Needs
This background is made using nail varnish and is good for using up any odd bits you have. It's very smelly though. Basically, what you do is put some water in a foil tray and drizzle nail varnish in contrasting colours over the top. You put a piece of card down on top of the water and it will pick up the nail varnish. It gives a marbled effect and should be left to dry thoroughly in an airy place.

Blushing
I learnt this technique several years ago on a class with textile artist Kim Thittichai. The base is brown paper painted with metallic paints. You then iron on Bondaweb previously painted with metallic paint (you need to put a piece of baking paper on top or it will stick to the iron). Once you have done that, you can iron on snippets of threads, ribbon, handmade paper, mica chips, sequins, beads etc.  You can also stitch it if you wish.