Morning all, it's Friday again and I've just realised this is the first post since last week. I think my mojo has gone for a holiday now as I've tried to do several things but haven't been happy enough with them.
This week's challenge over at
Polka Doodles has been chosen by yours truly and looking at the theme, I'm sure you can guess why I picked it. I wanted to show you all that you can do vintage style cards with the CDs and the stamps as I know there are loads of vintage fans out there.
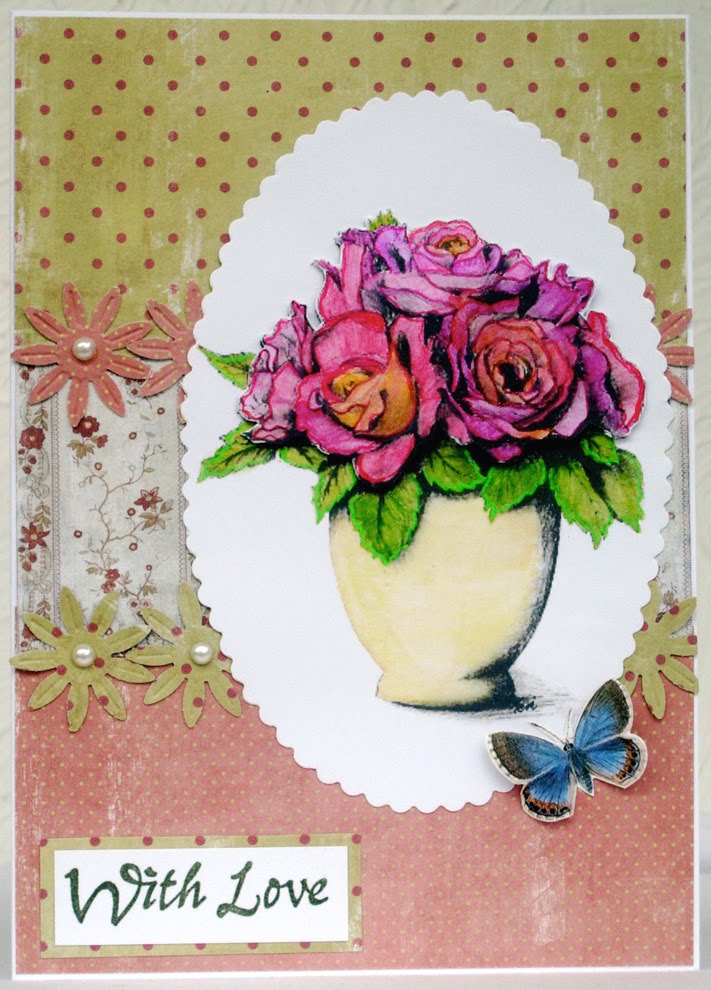
Here's what I made:
I made my own backing paper for the card with the lovely floral flourish stamp from the
Daisy Doodles stamp set.
For the pink paper, I stamped the flourish in Memento Sweet Plum and then sponged
Distress inks in Scattered Straw, Wild Honey and Victorian Velvet over the top. I then stamped on a few more flourishes in Victorian Velvet.
I made the green paper in the same way using
Scattered Straw, Crushed Olive and Peeled Paint Distress inks. I mounted this panel on a darker green mat made by sponging Peeled Paint ink just round the edges of the card and embossing with clear powder (Distress ink allows for this as it stays wet longer than conventional dye ink, part of the reason I love it so much as it blends so beautifully).
I made the flower by printing out some of the Housey, Housey text paper from the
Back To Nature CD and then printing the digital Stacking Flowers and Rose Leaves stamps from the
Love and Cherish CD on top. I then coloured the petals and leaves with Letraset Aquamarkers. I really love these as they have the most beautiful watercolour effect totally unlike conventional markers. I simply made streaks with 2 or 3 colours and blended them with a damp brush to give a lovely soft effect.
I then cut a circle with a Nestabilities Scalloped Circle die and coloured this with an Aquamarker and water brush. I embossed it with a Quickutz folder and then rubbed the side of the same Aquamarker round the edge for a distressed edge look.
I stuck the pink panel to a card blank and added the other elements as shown with a greeting from
Back To Nature CD coloured with Aquamarkers and a domed sticker in the centre of the flower.
The Aquamarker challenge is running until 31 August so for a chance to win some of these unique markers, pop over to the
Challenge Blog for details and another fab tutorial from Nikky plus details of her Create and Craft show on 22 August at 10am.
Finally, I'm entering my card in a couple of challenges:
Stampin' For The Weekend - Anything Goes
Stamp Something - Something Digi (my flowers and leaves)


.JPG)


